
Back That Lab Up!
Using Borg Backup -A Practical Example

Resistance Is Chunk Based
IMPORTANT NOTE: 2/26/25
This guide goes over how to use Borg Backup to easily-ish backup your server and have deduplication minimize disk use. If you have one machine, then that’s your restore point via Borg. If you are going to migrate from one machine to the other though, there is a script located in /opt/unetlab/scripts/migrate_new_host.sh that you run on the target machine.
So I discovered when I was restoring my own lab using the script to go from one machine to another that while the script did work, my /opt/unetlab/tmp backing files appeared to copy over, though they were being deleted right after being copied.
I dug deep into the issue and it turns out there there is a script that keeps the /opt/unetlab/tmp tidy by deleting any backing file that doesn’t have a corresponding entry/session in the sql database that tracks it all. It’s a vicious cycle, because of course it doesn’t have the database on a new build. And when using the script the database restores AFTER the tmp copy. Silly.
So there are two workarounds you can do, and you’ll need to do this prior to restore on the target machine regardless if it’s with the Borg restore or migration script.
On the destination, run
systemctl stop harddisk_limit.This will kill the script so the restore can happen. You can restart it after withsystemctl start harddisk_limit.
ORRestore the database that you exported/backed up following the process found below. You can use
mysql -u root -ppnetlab -D pnetlab_db -e "SELECT * FROM node_sessions;"to see if the database exists after restore and then press on with the restore.
END NOTE
Ok now that I’ve gotten the Star Trek pun out of the way, let’s talk lab backups. I run a PNET lab server, and my disk usage is about 2TB. And it’s always in the back of my mind “RAID is NOT a backup.” But oof. That’s a lot of space, and I don’t want want to really use that much for backups.
So I need some sort of compression, some sort of deduplication. I’d also like the install to be minimal, and not too terribly difficult to use. My lab server is extremely important, and I want to avoid tinkering under the hood as much as possible.
So I fired up a VM of PNET to test products out on before I messed with my bare metal install. I copied over some lab files and started my testing.
Syns Of Our Folders
Ok fair warning. The puns aren’t likely to stop. I have a Synology NAS, so I thought I’d try Hyper Backup. While it DID work, I didn’t find that its incremental was all that effective and I balked a bit at its seemingly closed source backup method/container. I need something a bit more accessible and not locked to a platform. Plus, it was kind of slow. NEXT!
Duplicati
I had heard good things about this one. The install was a bit annoying, requiring multiple dependencies, especially for the GUI. The CLI commands weren’t thrilling me either. I got it working, but after an hour or so it would fail, every time. I went looking for answers and then saw this:
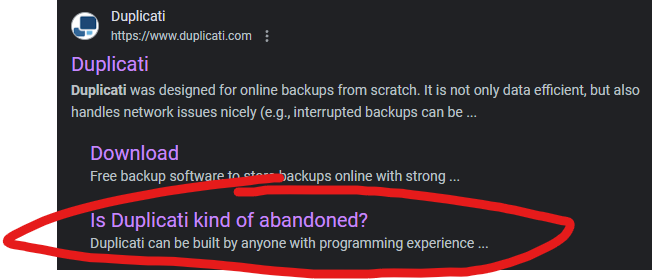
And for that reason…I’m out. NEXT!
RSync
I know that Rsync is the grandaddy here and highly regarded. I just found the command structure to be a bit onerous, and the opinions/methods on block level sync is all over the place. For my large image files it seemed to copy the entire thing and just not the changed blocks. I’m sure I was doing something wrong, but time is precious. For my needs, it just wasn’t cutting it. NEXT!
Borg Backup
Here we go. THIS is the one. There’s something confusing I want to get ahead of right off the bat, however.
There is Borg Backup, and BorgMatic. BB is the backup application and BM is a wrapper for BB to make some parts easier/extend functionality. It sure looks nifty, but I don’t need it for my use case, and I want to keep my installation simple.
Borg Backup provides compression, deduplication, and incremental backups. So far, it’s worked very well. Let’s work through the process.
Install and Setup
In my experience all you need to install is Borg and CIFS. I’m sure you can do it other ways but this is how I did it. My base OS is Ubuntu Server.
sudo apt-get install cifs-utilsFor Borg, I am going to use the standalone binary process.
The recent binaries can be found here.
Note: PNET up to 5.5.18 currently runs on Ubuntu Server 18.04.6 LTS.
This rev has GLIBC_2.27, not .28 which is on Ubuntu 20.04.6+
There is a binary “borg-linuxold64” that can run on 18.04.6 LTS.
PNET V6 beta runs on 20.04.6 LTS however so I’ve included both methods below.
After installing log out/in for the borg commands to be available.
18.04 Process:
wget https://github.com/borgbackup/borg/releases/download/1.2.8/borg-linuxold64
sudo cp borg-linuxold64 /usr/local/bin/borg
sudo chown root:root /usr/local/bin/borg
sudo chmod 755 /usr/local/bin/borg
20.04.6+ LTS Processwget https://github.com/borgbackup/borg/releases/download/1.2.8/borg-linux64
sudo cp borg-linux64 /usr/local/bin/borg
sudo chown root:root /usr/local/bin/borg
sudo chmod 755 /usr/local/bin/borg
That should be it for installs. Ok. Let’s set our network storage setup and mount the drive.
Let’s make our mount folder.
mkdir /mnt/[whatevernameyouwant]
Now, let’s mount our network drive via FSTAB.
What’s FSTAB?
Example: nano /etc/fstab
//10.0.0.50/lab_backup/borgbu /mnt/[folder you created]cifs username=admin,password=eatatjoes, iocharset=utf8,uid=1000,gid=1000,file_mode=0777,dir_mode=0777 0 0
Note that it’s network path, your mount path, protocol, and a bunch of Linux funtime.
Save the changes, then mount -a. If nothing happens, yay! Let’s validate. Let’s list the mount drive.
ls /mnt/[folder you created]/
So in mine it look thusly:

Success!
Initializing the Backup Directory and Setting Variables
The first thing we need to do is initialize our backup destination. For deduplication Borg stores things in chunk files and doesn’t rewrite data that already exists.
Science, Mr. White!
cd /mnt/[path]Example: cd /mnt/borgbu/
borg init --encryption none [repo name]
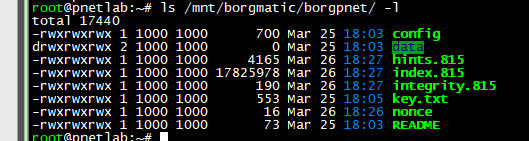
This init process will create this folder on the destination, plus the supporting file structure. Here’s what it looks like on my network storage.
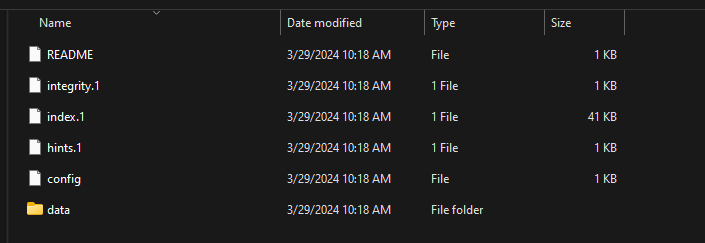
And locally.

NOTE: The default setting for a backup is to encrypt it. This a lab backup, so that’s not a concern. My example is to not encrypt. If you’d like to encrypt the backup when initializing, please consult the official guide.
OK. We need to export some variables to make our experience more user friendly. If we don’t every interaction is going to be:
borg [command] [full path]
passphrase (if you’ve chosen encryption)
BLEH.
So we’re only going to use the repo variable, if you’ve encrypted and want to include your passphrase, also use that variable. (LOTS more variables on the Borg site) export BORG_REPO='[path including backup folder]'Example: export BORG_REPO='/mnt/borgbu/borg-pnet'
export BORG_PASSPHRASE='eatatjoes'
But let’s see what this does. We’ll navigate back to root and run “borg list”.

Hard fail. We need to include the whole path in the command. Running the command in the location of the backup isn’t enough.

This gets tedious quickly. Let’s export our variable, then run the command.
Example: export BORG_REPO='/mnt/borgmatic/borgtest'
Oh, yea. That’s the stuff. Now, the export command on its own will not survive a reboot or even subsequent logins. Let’s make it permanent for our logged in user.
We’re going to add the variable to bash. Here’s the command.
First let’s make sure we’re in our home directory and edit the file. cd ~
nano .bashrc
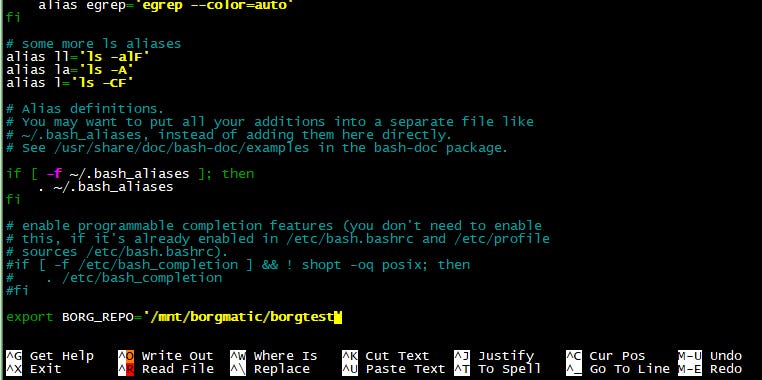
I added it to the bottom. Write the changes and then run borg info from a new session. It should map correctly.
Backup!
Ok, let’s go over our backup command structure. Note how some arguments are after the create command.
borg create --list --stats ::{now} [list of folders]
create: tells borg to create a new backup
list: this process is silent by default, so will provide some feedback.
stats: at the end of the job, will show information about the job
Double Colon: this is how we refer to the backup name structure. The “now” will
automatically name it with the date/time. It can be anything you want
however.
For our PNET/EVE backup here’s the folders I’m backing up:
/opt/unetlab/addons : for all the templates I’ve added
/opt/unetlab/html: icons, default template settings, etc
/opt/unetlab/labs: the actual yaml structure of the labs
opt/unetlab/schema: I don’t know that we NEED this one but it sounds important.
/opt/unetlab/tmp: the actual physical backing files of the lab nodes.
I should be able to back these up, reinstall PNET and then restore and be good to go.
My command will look like this:borg create --stats --list ::{now} /opt/unetlab/addons /opt/unetlab/html /opt/unetlab/labs /opt/unetlab/schema /opt/unetlab/tmp
The nice thing about the “now” variable is that this is the only command I need to run for subsequent backups, so I can use this as my string going forward. Before we start, let’s talk job process. These backups can take a while, and I like to be able to end my SSH session, login back in, check on the progress, etc. There’s many ways to do this but I like running the process in a tmux session. It’s easy.
Simply enter “tmux” and you’ll get sent to this lovely little pocket universe.
Now I’ll run the backup command. If I want to close out, I can ssh back in run tmux attach to get back to the interactive session. This keeps the job alive. I can simply exit tmux when finished.
At the end, we’ll see stats about the job.


This is small job, with not many duplicated chunks. Let’s see what it looks like on my prod box.
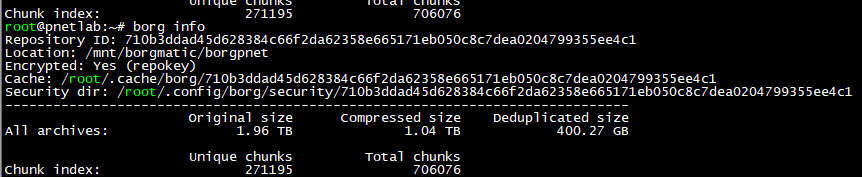
I’ll use borg list and borg info with the ::[backup name] option.
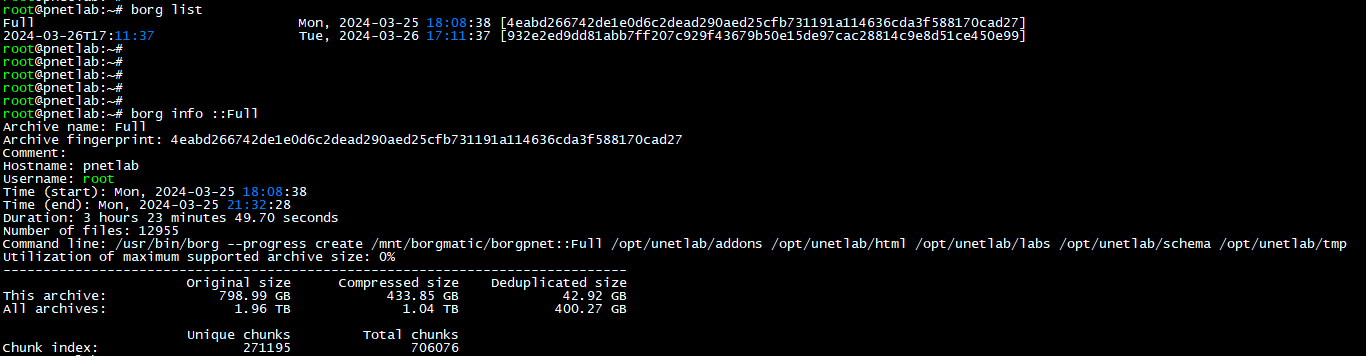
I can also run it with just info.
400GB for 2TB? HOT DAMN! I’LL TAKE IT.
Restore
Now, let’s restore my backup to a brand new PNET server. I created my mount point, set my entry in fstab, and then successfully mounted. I then exported my variable and saved it in bash. Let’s do this.
The command is much simpler than the create command. Really, the only difference is the backup name as we need to call it out, and leaving out the latter arguments. I used borg list to get the backup name, and we’re ready to go. Well, almost.
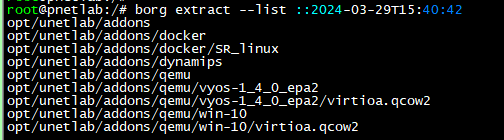
Borg is going to extract to the directory you run the command from. So let’s ensure we cd to / before starting the extraction. We’ll use the list argument to give us some visibility. Feel free to leave that argument out if you don’t care about seeing the output. If you’re restoring a large backup probably start this from a tmux session. Example:
cd /
borg extract --list ::2024-03-29T15:40:42
And that’s it! The great thing is that you can continue to use the same repo going forward for your backups as well, as well as that standard backup command.
Borg Backup is tremendously powerful and I barely scratched the surface on what you can do in my simple practical example. You can automate with scripts, have remote repositories, etc.
Really give the main site a good read through. The documentation is well written and extensive. And if you need some extended, easier to use functionality, give the Borgmatic wrapper a try. And remember, a backup that isn’t tested, is that a backup at all?
Update: 4/29/24
What follows applies to PNET only. EVE may have a different process for restore.
Hey remember that last part where I said “backup that isn’t tested, is that a backup at all?”
So…yea. A colleague followed my guide and it went great until he noticed after restore that his node>folder bindings were all jumbled. This was a restore to a completely new install on the same server.
This resulted in most of his nodes coming up as default. The backing files were still there in the original folders, so he had to move stuff around. Tedious. This was unforeseen, and the PNET devs tell me its something that will be resolved in V7. This happens because there is a sql database that if not backed up/restored will re-init to defaults on start of the new system and cause the jumble.
But I have a fix, and a note. If you are migrating from one server to another
(in that you have separate box running at the same time) there is a script you can run that will copy everything over live, and restore the database.
It’s located in /opt/unetlab/scripts/migrate_new_host.sh1. reboot after installation of new PNET 6.0
2. shutdown all the Lab running on OLD PNET Server before Migrating.
3. Run below script on the NEW server to get all from OLD Server to New Server (takes Long time to Migrate depends on Addons)
/opt/unetlab/scripts/migrate_new_host.sh -s [Old Host IP] -p (root password)
This will take time based on the images you have on the old server.
Finally fix the permission
4./opt/unetlab/wrappers/unl_wrapper -a fixpermissions
Ok now, let’s talk about the steps needed to do a restore on a new install on the same box. I picked apart the migration script and found the lines for the database backup/restore. I works like this:
1. Shut down all lab nodes.
2. From SSH run: /usr/bin/mysqldump --password=pnetlab --add-drop-database --skip-comments --databases pnetlab_db guacdb > "/opt/unetlab/database_backup/remotedb.sql"'
Note: I modified this command to backup to the database backup folder so it would be caught in our default Borg job. Verify the command deposits the file in that directory, then open it with notepad and check it out. It should be full of all sorts of fun stuff.
On your new 6.x+ server restore using Borg, but do not start any lab node. This is important.
SSH into the new server, and run:
cat /opt/unetlab/database_backup/remotedb.sql/remotedb.sql | /usr/bin/mysql --password=pnetlab
This will restore the database.
5. Next we need to zero out the stats for the new database, run:echo "alter table users add column user_max_cpu int default NULL ;" | mysql --host=localhost --user=root --password=pnetlab pnetlab_db &> /dev/null
echo "alter table users add column user_max_ram int default NULL ;" | mysql --host=localhost --user=root --password=pnetlab pnetlab_db &> /dev/null
echo "alter table node_sessions add column node_cpu float default 0 ;" | mysql --host=localhost --user=root --password=pnetlab pnetlab_db &> /dev/null
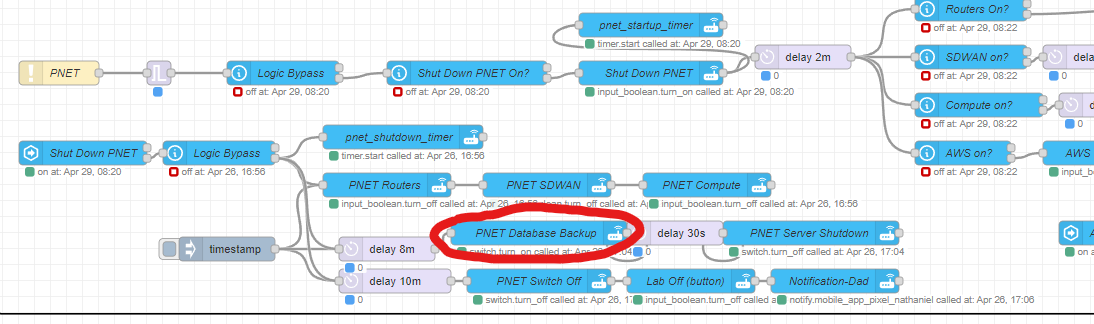
echo "alter table node_sessions add column node_ram int default 0 ;" | mysql --host=localhost --user=root --password=pnetlab pnetlab_db &> /dev/nullStart some nodes in the lab and they should come up as expected.If you’ve read my article on Using Home Assistant to Automate Labs then you may have already realized you can include this back up process in your automation flow. I simply added the command to a new entry in configuration.yaml rebooted and included the entity in my Node Red logic.
E.G.- switch:name: pnet_database_backupcommand_on: ssh -o StrictHostKeyChecking=no -i /config/.keys_ssh/id_rsa root@[PNET IP] '/usr/bin/mysqldump --password=pnetlab --add-drop-database --skip-comments --databases pnetlab_db guacdb > "/opt/unetlab/database_backup/remotedb.sql"'
Then I put it in right before the system shuts down. The database backup only takes a few seconds. You could even build out a new Boolean to have a button to trigger it manually from HA if you so choose.
Well, that’s it for this one.
Until next time.