
It's A Secret To Everybody...
Using Ngnix Proxy Manager and Let's Encrypt

For your typical end user, obtaining and maintaining domain certificates has typically been a bit of a pain. The process was a bit murky, and then sometimes difficult to implement and also came with a recurring cost. Then, modern browsers started to reduce the time a public cert would be valid, first three years was the norm. Then two. Then one. Soon, if Google has their way it will be three months.
Source: https://www.digicert.com/blog/position-on-1-year-certificates
For a home lab, or even a home or SMB infrastructure proper certs on resources are not only tremendously satisfying, but also provides that level of trust that the site or resource you’re going to is authentic. Getting there though can be a bit of a lift.
And then there’s the cost issue. Do you get a wildcard cert, or individual cert for each service? How do you manage them? How about renewals? Etc, etc.
Enter Let’s Encrypt. This organization provides free short lived 90 day certs, whether they be wildcard or single. It uses certbot to manage the issuance and renewal of certs. Using Let’s Encrypt is as simple as running this command on Ubuntu: sudo apt-get install letsencrypt
That installs everything you need. Then you run this command to start the cert process. This example is a cert for a wildcard.
sudo certbot certonly --manual --preferred-challenges=dns --email someguy.net --agree-tos -*.someguy.tech
Then you need to prove you own the domain, here I use the DNS challenge. You place a TXT record that the application provides in your public DNS, then wait about five minutes, continue the process and presto-chango, you have a cert.
The email address will allow Let’s Encrypt to email you when the cert is going to expire, and to renew you simply run the same command again. There are different kind of challenges to prove ownership, but we’re going to focus on DNS.
Note: There is a cost associated here no matter what in that you must own the domain and have public DNS you can edit. Hunt around, you can find domains pretty cheaply depending on the TLD. I recently bought a .CC domain for 24 dollars for three years from Cloudflare.
However, while this is super handy there are some shortcomings to this approach. It’s a little tedious, and while you can have certbot automate the renewal via crontab (I’ll cover this later) every thirty days you’ll have to upload the renewed cert to your resource. Also, for every new domain you have to go through the ownership validation.
And to the folks that may say WELL, ACKSHULLY, YOU CAN AUTOMATE WITH X,Y,Z, cool story bro. this guide isn’t for you. For the rest of us, there’s a turnkey solution that will not only make this process much easier, but also allow for other features, such as allowing secure web access to resources that don’t have the functionality or honestly, are just a pain in the ass to implement with.
Enter Nginx Proxy Manager
Nginx has been around for a while and it’s truly a nifty little platform. Not only can it automate the Let’s Encrypt process, it can also at as a proxy for resources, and use a cert to secure the traffic on egress. Essentially, on your internal DNS you point the domain’s IP to Nginx, and then you create a “host” that has the real IP and port of the resource. We’ll cover that process shortly.
Traditionally it’s a command line driven process, manually editing config files and such, and the “ACKSHULLY” crowd loves that stuff. For me, if a serviceable GUI exists, I’m happy to use that because I have a life that needs living, and I can’t know all the things.
Nginx Proxy Manager fills that need. It can be deployed as a docker, which is the easiest method.
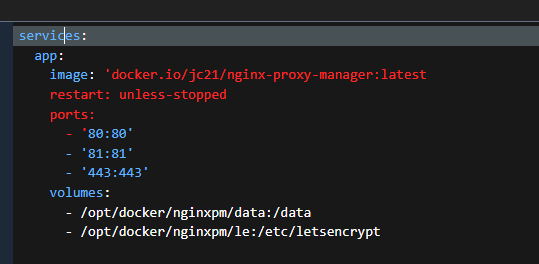
Stack file example is at my Github.
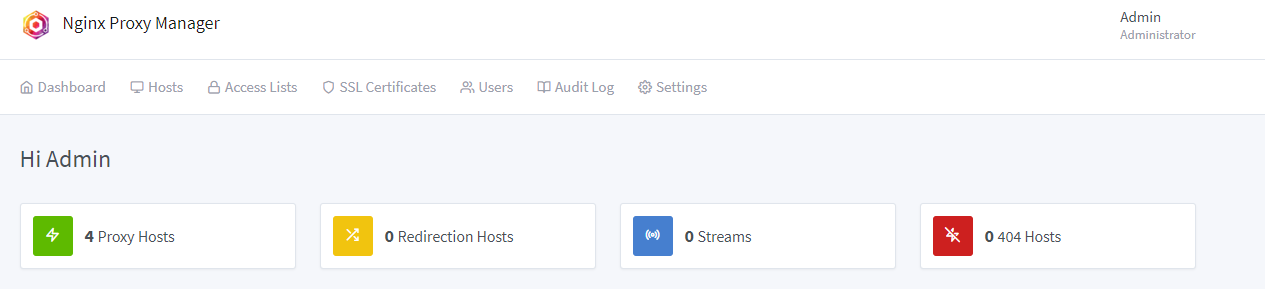
Once up running, logging in is pretty uneventful. It’s a basic tool for a basic use. I have 4 proxy hosts on mine, with several certs.
Update: It’s now 34 hosts. :)
Let’s request our first cert.
Cert-ainly Useful
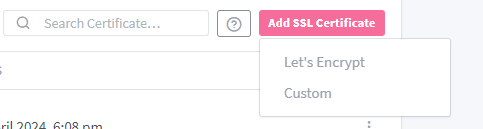
Click on SSL Certificates on the top bar, and “Add” SSL Certificate”
You’ll notice right away you can pick LE or “Custom”. Custom is if you want to use any cert you have and apply it to a proxy host. Super useful! Once you click the LE button, you’re presented with the setup process. Right away you’ll notice the challenge, email address, TOS, just like our command from earlier.
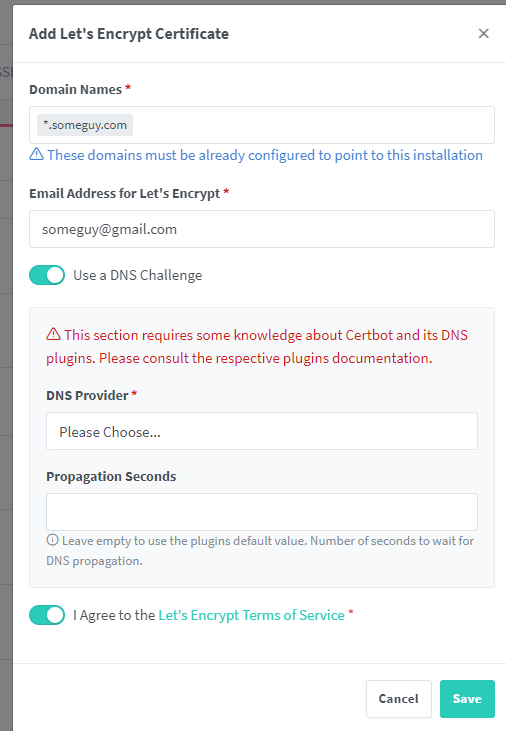
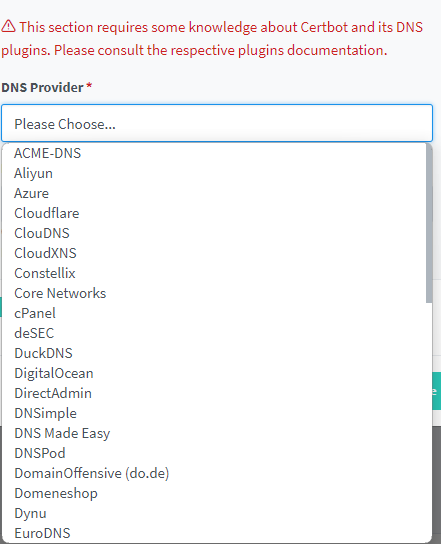
There’s a big difference here though. Unlike our manual command, we cannot perform the DNS challenge by ourselves. You must choose a provider that supports the API.
For a long time I resisted doing this because my provider was not on this list. I also host my mail there, so changing providers was not an option. You can change your DNS provider though, by changing the nameservers to point to somewhere else.
And that’s exactly what I did. I created a free Cloudflare account, changed my nameservers on my host to point there, and went through Cloudflare’s process. It was actually pretty damn easy. Once complete and verified, I chose Cloudflare as my challenge.
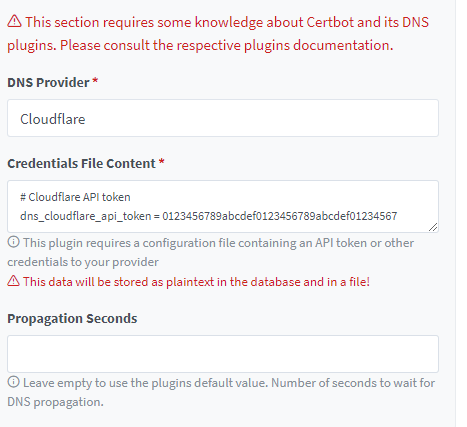
Every provider is different, for Cloudflare I needed an API key. This was also pretty simple. On Cloudflare under My Profile>API Tokens I created a token to use with my domains.

Once you paste the tokens, and create the cert it does all the work for you. In a few seconds you’ll have your cert.
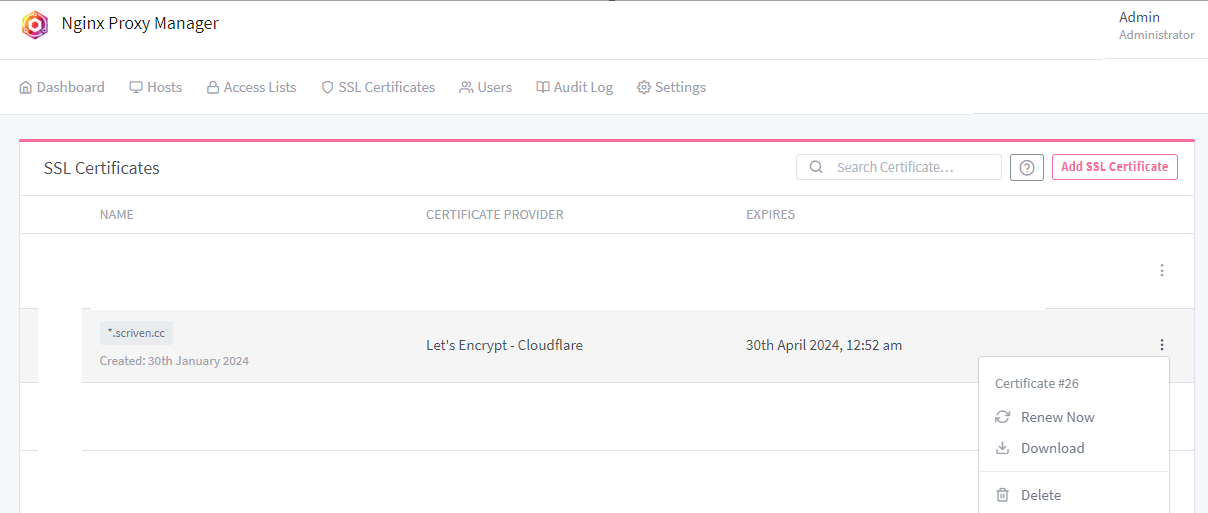
Once issued, you can use it for a proxy host and/or download for use elsewhere.
The download contains these:
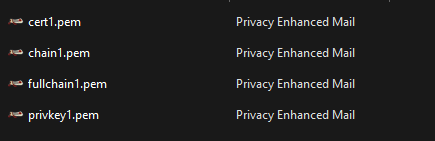
Typically you’ll use the cert.pem and the privkey.pem. PEM is an open standard, if you change the extension to .crt in Windows you’ll open it in cert manager. About the privkey…
Keep It Secret, Keep It Safe
The certificate is a public/private key relationship. Keeping the private…well PRIVATE is incredibly important especially for a wildcard cert. Someone gets that key, and they can spin up websites all over the place with that cert, with any subdomain.
Keys in this process are never encrypted. Store them someplace safe. Depending on your platform, if using the cert you may need to upload the key and cert separately. Other platforms will require a PFX file. This combines the public and private key in one file and sets a password. Let’s segue quickly into that process.
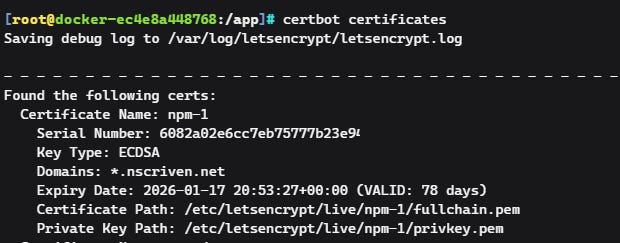
Ok so we’re using docker, so we need to access the certbot setup through the container itself. Once SSH’ed into the host, our command looks like this:sudo docker exec -it [container name or ID] certbot certificates
E.G., sudo docker exec -it nginx-npm-app-1 bash

Now run certbot certificates. This will list all certs on the install, and the path.
Ok so the path to the cert is in the container. That's not where you're going to go.
It’s in: opt/docker/nginxpm/le/live/nmp-[#]

CD into that path, if for no other reason than I hate long directory strings in my commands. We are going to use openssl which is preinstalled to perform our action.
openssl pkcs12 -export -in cert.pem -inkey privkey.pem -out cert.pfx
pks12 - format of the exported file
in - the cert
inkey - the private key
out - the pfx file
Once you enter a password, it’ll spit the file into that directory.
Fetch it off the box via sftp and you’ll have it for use.
Note: you may have to change the permissions of the directory before you can sftp to the /npm folder. The permissions seem to change on every cert renewal.sudo chown -R 1000:1000 /opt/docker/nginxpm/le/live/
Protip: If all you want to see is the output of available certs, run the below and it’ll print what’s shown in the container without entering it interactively. sudo docker exec -it nginx-npm-app-1 certbot certificates
Proxy Fun
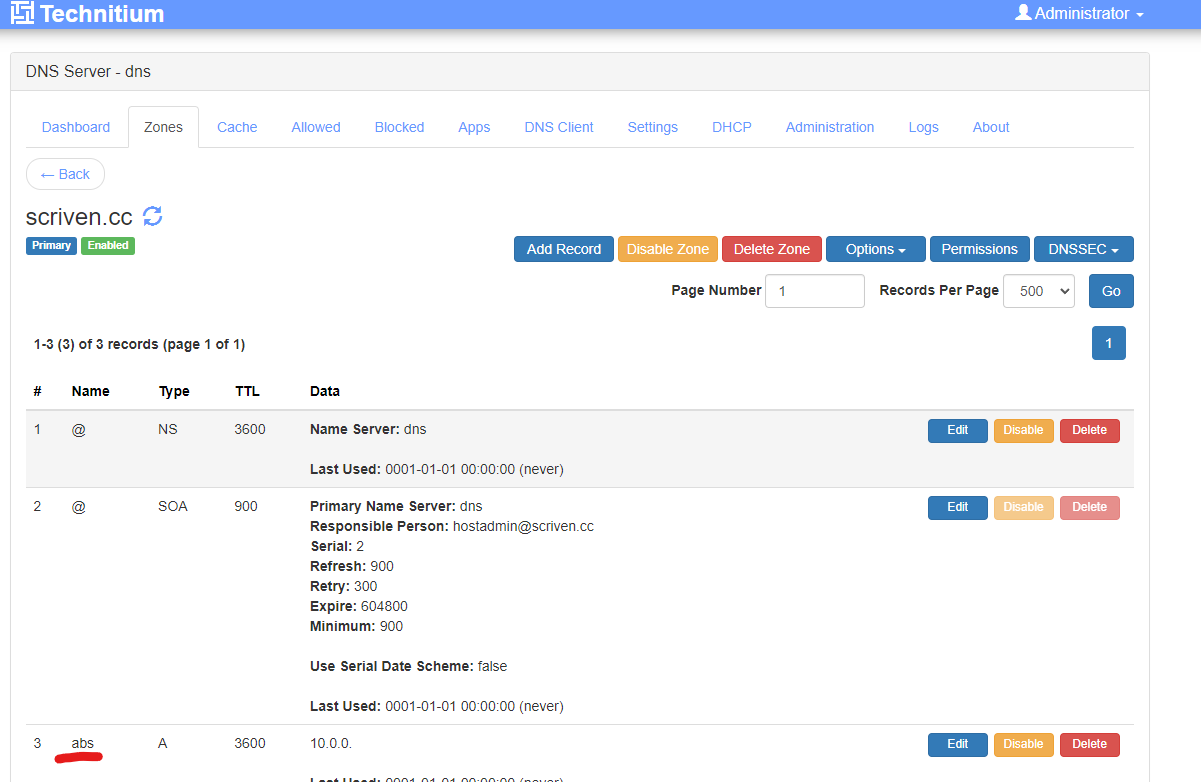
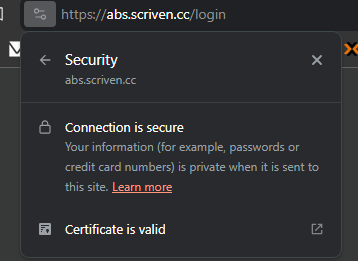
Lets set up a proxy host! I have a podcast server, Audio Bookshelf. I want it to be TLS encrypted for access and obfuscate the port it runs on. Perfect use case for a proxy. I will use my scriven.cc domain for this.
On my DNS I added a record, abs.scriven.cc and pointed it to my nginx server.
Now, let’s make the host in Nginx. I set the real IP and port here.
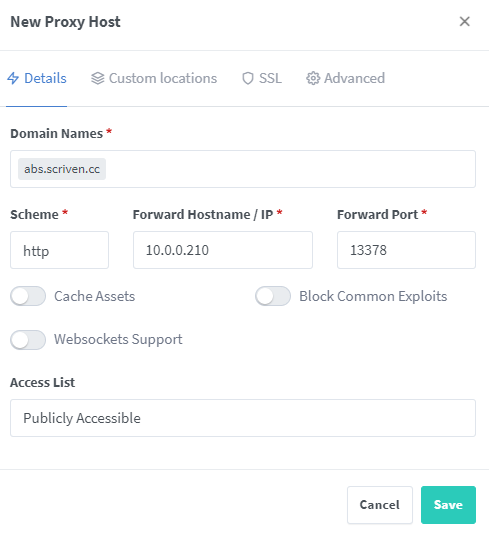
For now, just save it. When I go to that site, i get:
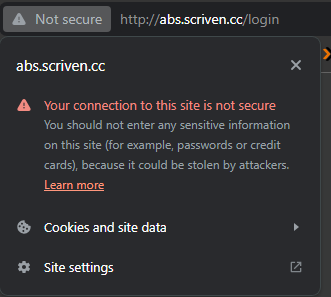
Now let’s add SSL.
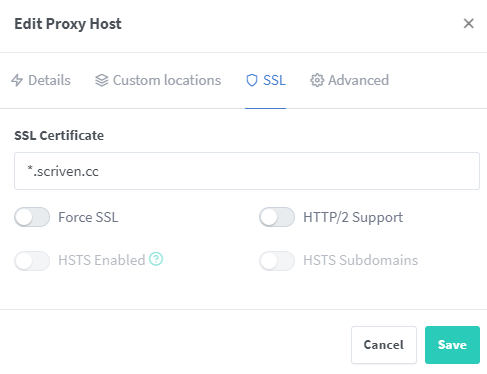
Magical. There’s also options as well like enable websockets (I needed that for ABS) and lots more customizations but it’s really simple to get going. The nice thing about using the proxy is that when the cert expires I just have to update the proxy server itself .
If you used the cert externally though you’ll have to grab the renewed cert and replace it. That can be automated, but goes beyond the scope here.
Proxmox Bonus!!
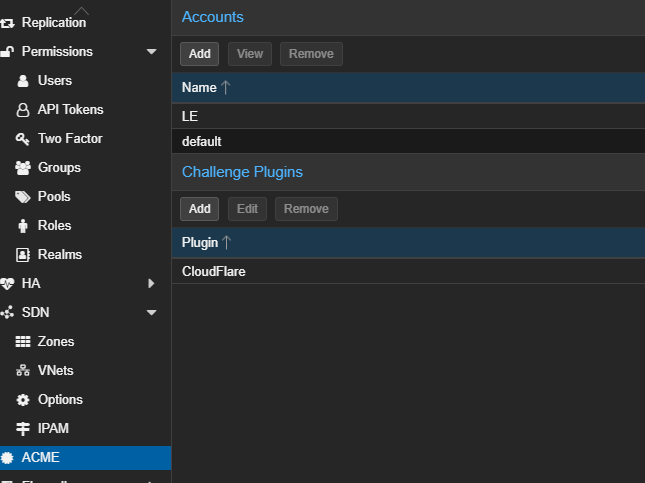
One of the really great things about this process is if what you’re using supports the ACME client you can get certs delivered directly to you for that resource. Proxmox and Proxmox Backup server support this.
Under datacenter, go to Acme and set up the account and challenge. Lots of options here, including Cloudflare. Once configured (the documentation is great here) then go the server>certificates and order the cert. The process is near identical for PBS.

Until next time.