

Intro and Musings
As somebody once said “This is where the fun starts, something something.” Once you realize what you can do with a coding agent, the whole world kind of opens up with new possibilities. Have a process you find tedious? Make an app. Have a docker image you love but the dev has kind of walked away from it? “Take it, it’s yours!” Iterate, improve and add features. But remember “With power comes great responsibility.” (I’m in a very meme-y mood today, and will likely continue. My apologies. )
Let’s establish a “citizen” code of conduct.
Always code with security and software quality in mind
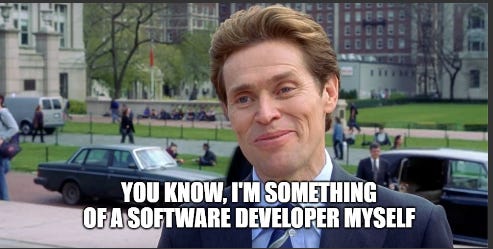
If you fork someone else’s project ensure you update the main readme, explaining you used AI to code it. Be transparent, don’t be this guy.
Have a thick skin, and keep learning.
Have fun, otherwise what’s the point?
Here’s a few examples of projects I’ve made/forked which just looks like shameless plugs but totally aren’t. Review these and look at the release notes/main readme to get sense of what I’m going for here as an overall philosophy.
My Projects:
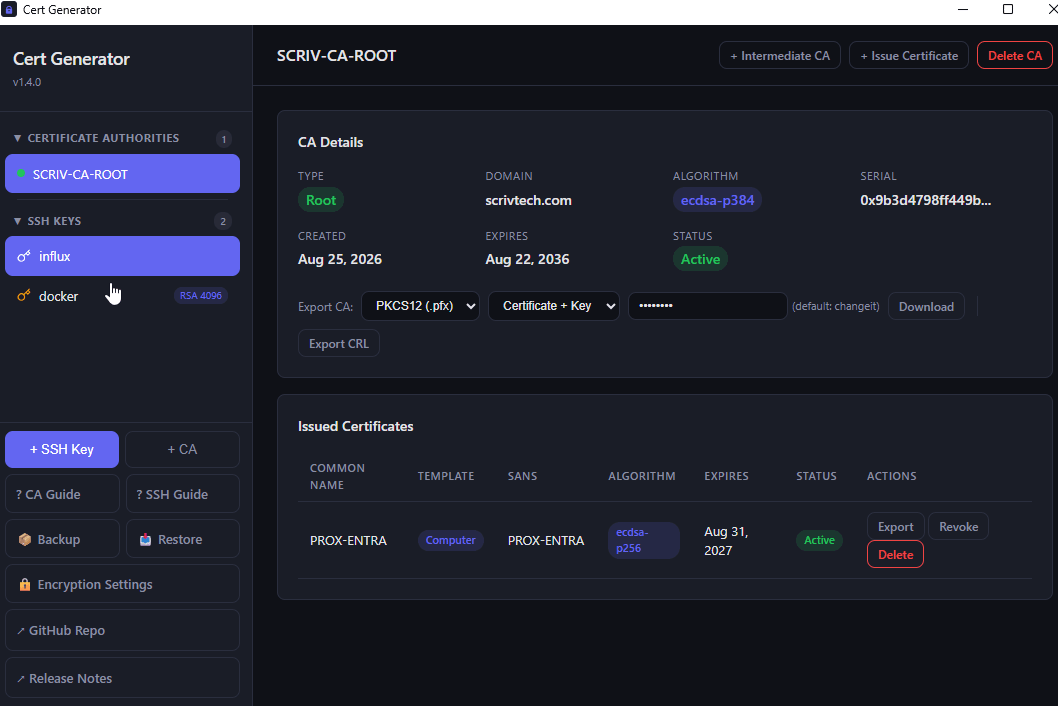
https://github.com/darthrater78/cert-generator
I found the routine process of making certs and SSH Keys to be a bit of a pain. So I made a tool. (In the process of also making it a docker image)
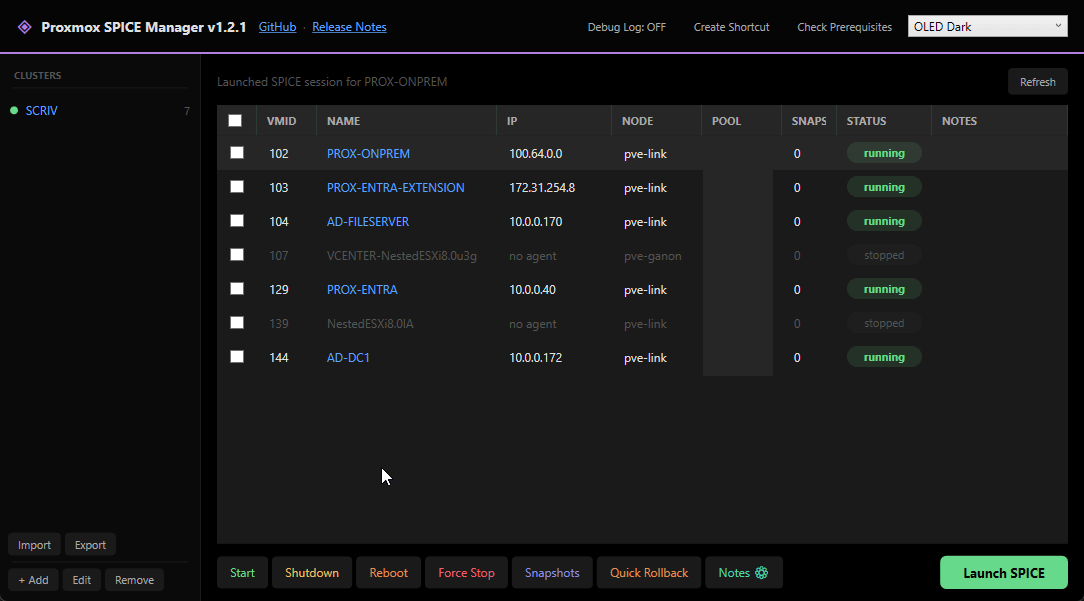
https://github.com/darthrater78/proxmoxspicemanager
API/Password connection to Proxmox for easy access to Spice console sessions.
Forked Project:
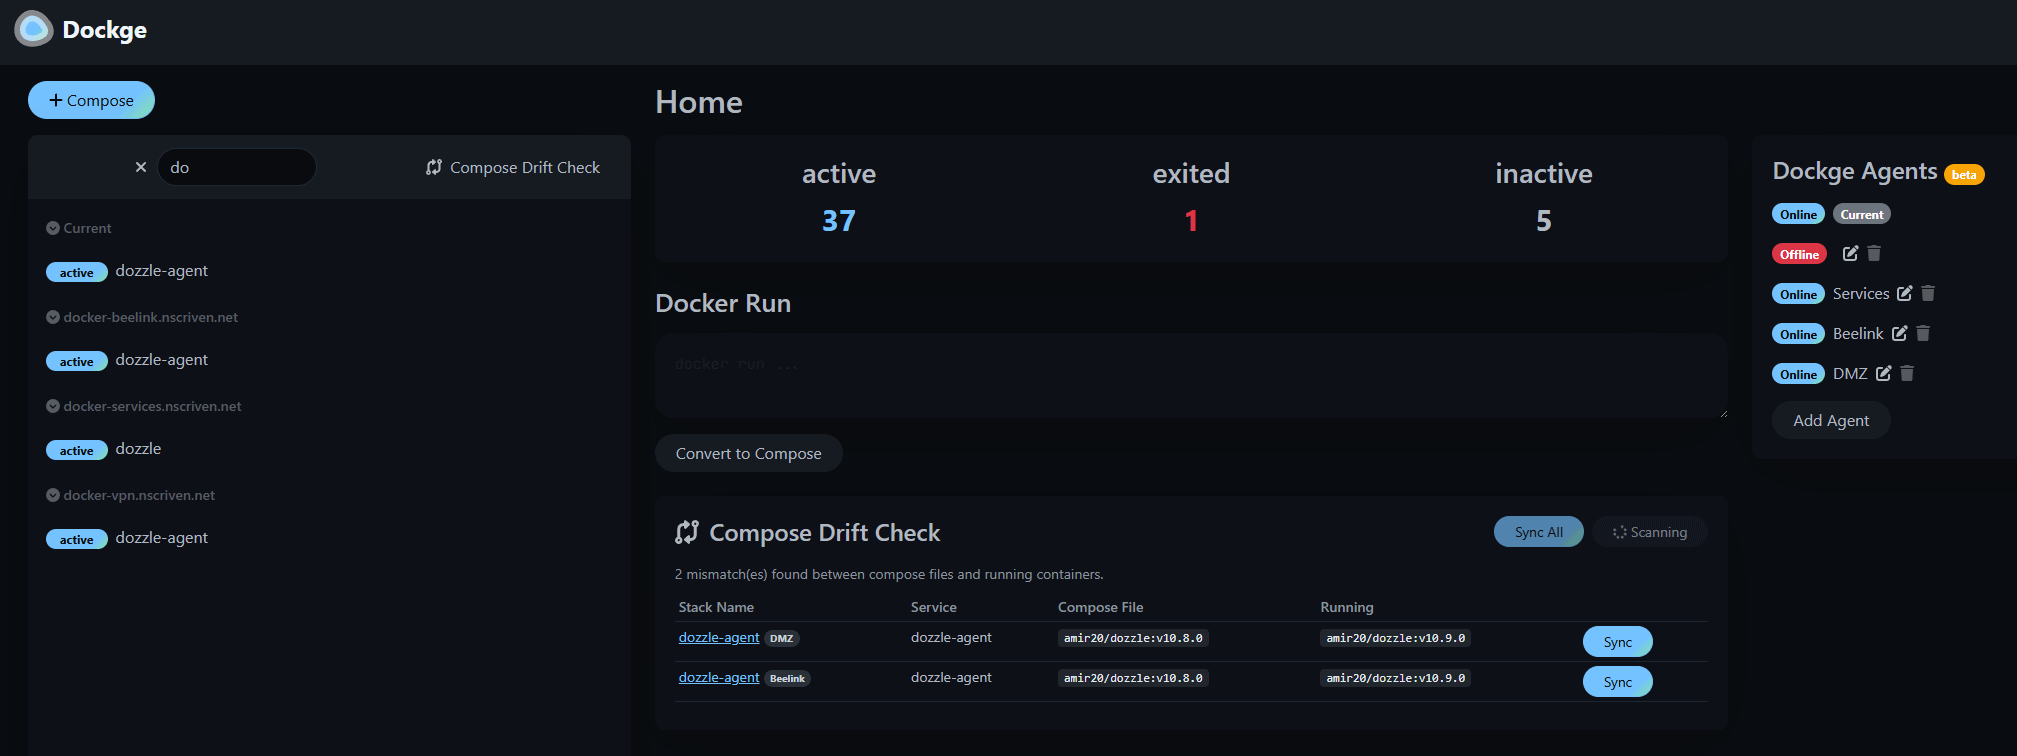
https://github.com/darthrater78/dockge
Here the example of someone else’s project I adapted and added new features to. For dockge I added an API and a compose drift sync feature. If you look at the page, I made sure to explicitly call out how these changes were made and to give proper attribution.
So the point of this overly long “soapbox of musings” is to illustrate what you can do, and set some ground rules. As always, this is how I do things. You may do things differently, and that’s cool. One last note. I’ve been “Mr. Linux” lately after moving to Fedora. However, my job insists I use Windows and my customers all use it as well for the most part.
So you’ll notice that this series will focus mainly on Windows as the platform, and most of the tools I made are Windows compatible. Proxmox Spice Manager is available as a python script, though. Let’s begin.
Git ‘er done!
Ok we may not be software developers by trade, but that doesn’t mean we shouldn’t develop like one. And the first thing we should do is operate via a Git framework. If you don’t have a Github account go open one. Git is an incredibly deep topic and we will not be going terribly deep into it. (okay, maybe a little) What you need to know is that it tracks software versions, allows for easy collaboration and makes publishing easy-ish. Let’s get some definitions set.
Repo (Repository) - those projects I shared? Those are Github Repos. Its a fancy folder for your stuff. Each project gets its own repo. A Github repo can be edited on the website directly, or you can pull down a local copy via clone.
Repo Actions
Fork - You’ve seen me mention this several times. When you fork a repo, you make an out of line copy of someone else’s work to your own repo. Nothing you do affects the upstream directly, though you can submit your commits to the fork(ee) for consideration. Its part of the beauty of open source software, when you can take someone’s code and build off it. You’ll see that sometimes someone will take someone’s project and build something totally new. For example, Jellyfin is a transformational fork of Emby. Your fork is visible from the parent repo, and can also be compared.
Clone- When you clone a repo, you are working on a copy of the upstream code, including its full git history. You typically clone your own repos (even forks) to work on them locally. Any public repo can be cloned. Unlike a fork, an unforked clone has no ability to submit changes to the original.
Git Commands
Commit/push - When you make a change to a repo, you store those changes in a commit. It’s important to understand changes are ephemeral until committed. You should commit after work is completed. Think of it as a snapshot. It will show changes, and assign that commit a unique value. A commit can eventually be merged into the main branch to be active in the codebase if committed to a different branch. If you are working with the repo locally, you would commit the change locally and then “push” the commit upstream.
Branch - The primary branch is usually called Main/Master. I’ll refer to it as Main in this document going forward. Typically, as a best practice when you start new work, you would open a new branch and add commits there. Commits to a branch are active to the current branch at the time. Once you’re happy with the work, you can merge into Main after a pull request. More on this later.
Pull Request (PR) - This is the concept I found most confusing at first. Let’s say you made a change to the repo. It could be a readme change, code update, feature addition, anything. When you commit and push the change, those changes are sent and committed to the branch it was made on. If you want that code to become a permanent part of Main, you have to ask the repo owner to review and “pull” your changes into that branch via a Pull Request. They can then decide to “merge” your changes into the codebase, reject it, or just totally ignore it. And man, PRs get ignored a LOT.
Merge - When a PR is accepted, the commits are merged. The two basic merge types are standard and squash. Standard takes all the the commits and merges them separately. Visually noisy, but granular history. A “squash” collapses all the commits down into one. You lose the commit history and the ability to more accurately target code tied to a particular commit. I use standard for the history.
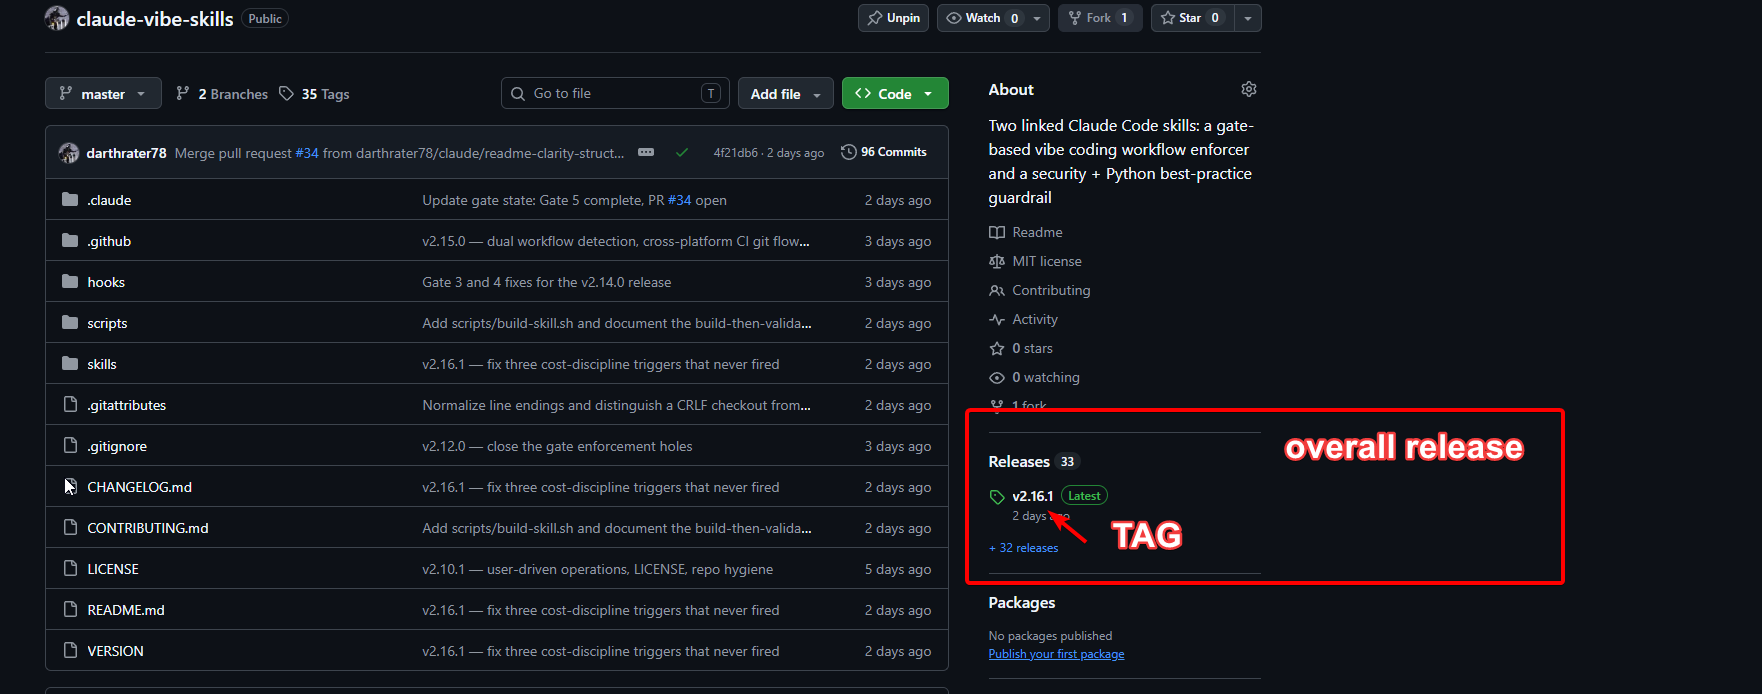
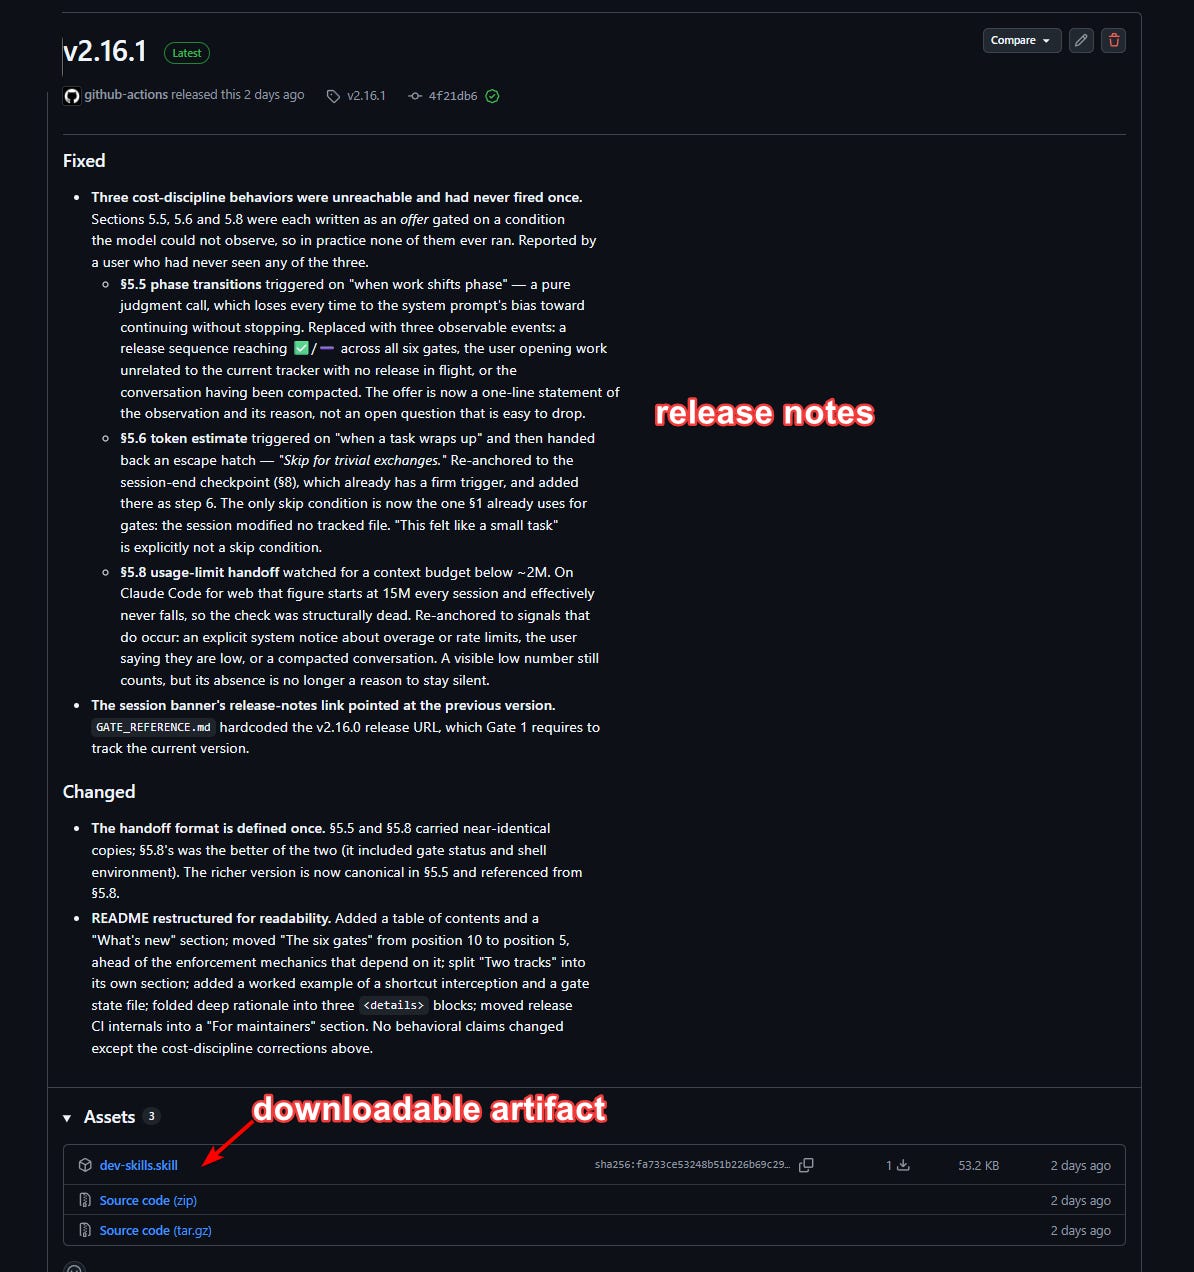
Tags - we'll be using tags quite a bit for releases. When we use a tag, we are marking a specific commit. We can then create a “release” around that tag and add an artifact (if needed) and release note text. A tag can also be used to kick off an automated workflow as part of a release. In the picture below, you can see that I am telling users that this tagged commit is the code I want them to use as the current standard.
Artifact- Let’s focus on this for a second. We’re developing for ourselves and others. As a good citizen, we should be presenting users with compiled and easy to run code. Whether it’s an .exe, .sh, or a .zip. Let’s not make the users have to worry taking your code and building it from scratch. Present a completed product. If we’re making a docker container that’s a bit different. In that instance there would still be a tag and release but typically no artifact. Docker images are hosted elsewhere.
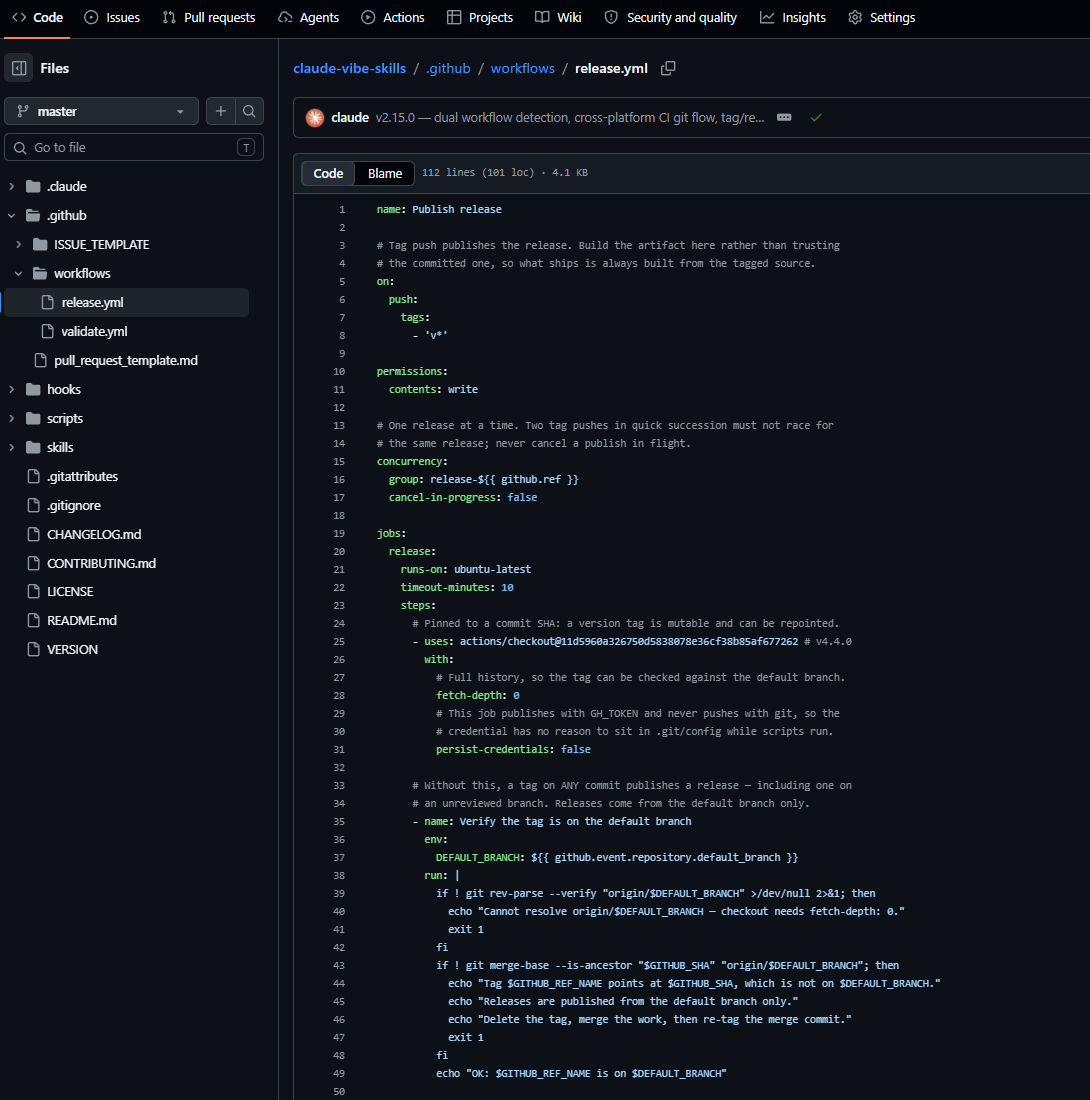
Workflows - These are automations we can tie to a repo. They are yaml config files, under the “Actions” tab. There’s a lot to it. Thankfully there are templates. Claude is really great at helping us shape and refine these templates. Many actions can kick off a workflow. Push, PR, release, fork, watch, etc. Go take a look at your favorite repo and check out actions, see if there are workflows.
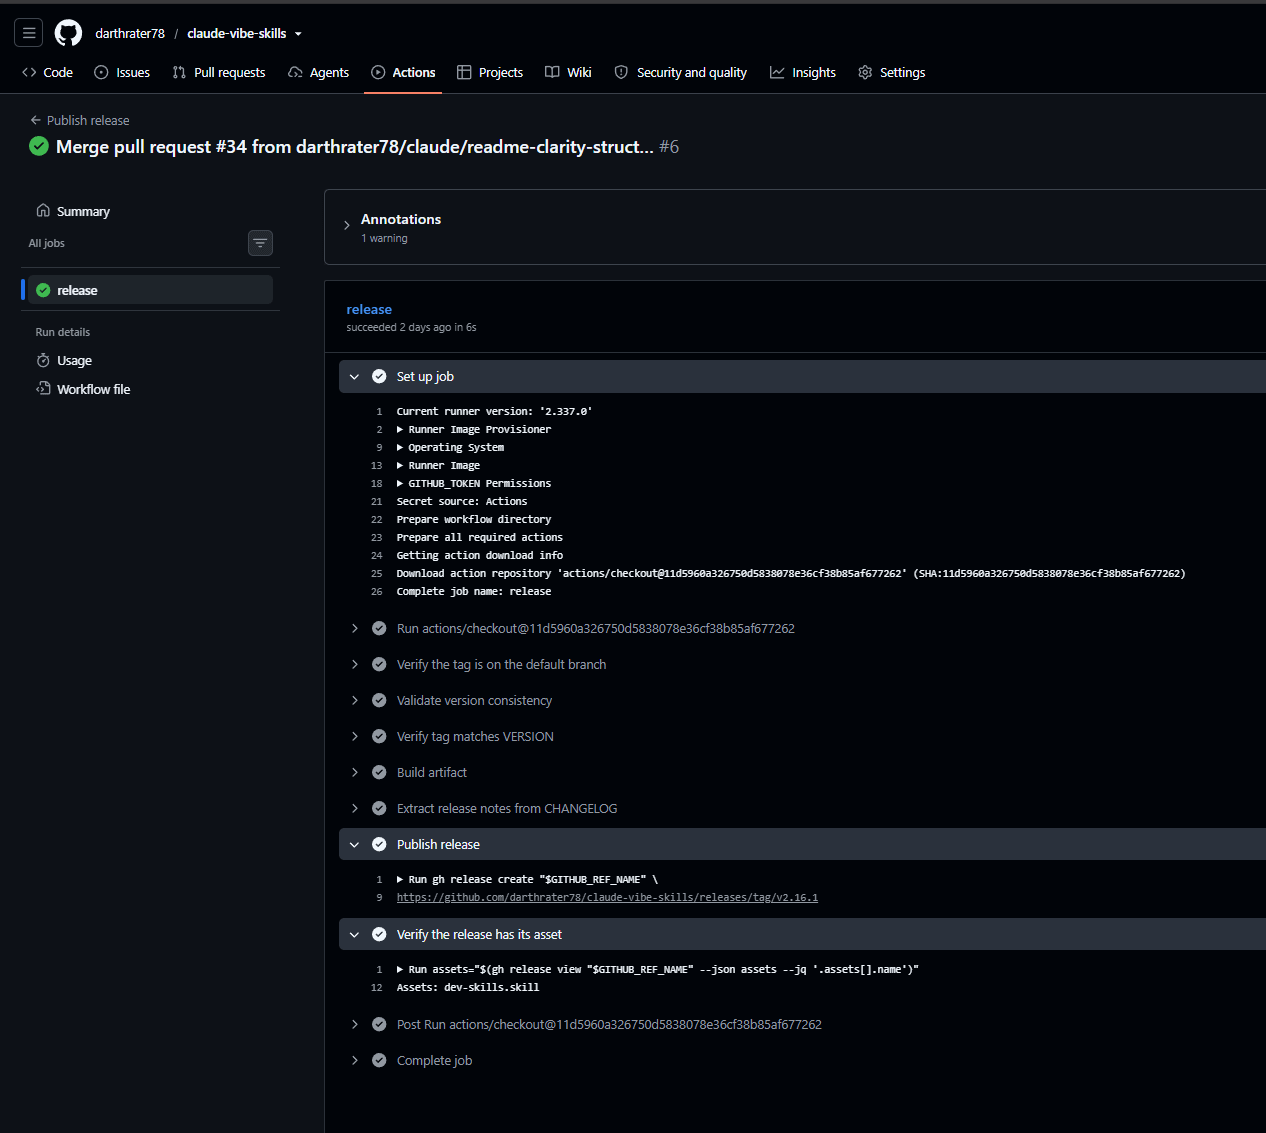
CI (Continuous Integration) - I recently learned about this and it’s kind of amazing. You can build your code locally, and have all the software you need to compile. For Android, the SDK, Windows .NET, Docker, …Docker, etc. OR you can have Github compile the code for you via actions as you wait. Look at the screenshot below. See how it’s building the artifact and publishing the release? Neat stuff. Githhub accounts are free, and the CI part is also free for Public repos. Private repos do have limits on usage, but your standard hobbyist is unlikely to hit it.
I need to stress that Git is so much more than this. Commits can be moved, deleted, “rewound”, Claude is going to to do a lot of it for us. What I outlined is the basics you need to know to be familiar.
If you want to approach this better armed with some more education watch this: Git Tutorial for Beginners: Learn Git in 1 Hour
Conclusion
I have learned much since I’ve published part one. I must have rewritten this section three times adding things. It’s quite the journey, but I feel you can’t be a Citizen Developer without having a working knowledge of the basics. As mentioned above, Git is so much larger than this article. Do yourself a favor and watch the video I linked.
In the next part, we’ll go over using Claude and Git to make a software project.
Until next time.