
It's Docker-ing Time! Part 2
Docker and Portainer Install

Docker Installation and Setup
Prerequisites: Current Ubuntu Server LTS. If you’ve never used Ubuntu Server and just Desktop this is your opportunity to challenge yourself. I’ll cover some basic commands to get you over the hump.
I won’t cover getting the VM installed, so we’ll assume you’re at a command prompt via SSH and ready to get to work.
Let’s cover some basic commands .
sudo - since we won’t be running as root (nor should you) we’ll run commands with sudo before anything docker related or requiring higher permissions.
ls -la - this will list the contents of a directory plus permissions. As we’ll be editing some permissions we’ll need to validate.
pwd - shows the path of the current directory. Useful for getting our bearings. Also handy for lazy typers who would rather copy/paste than type out a long path.
nano - text editor.
cd - change the directory you’re working out of.
/ - this is a representation of the root directory. E.G. cd / will take you to the root directory. Also implied in a path. E.G. the path to the opt folder is /opt .
mkdir - creates a directory
rm - deletes a file. To delete a folder, add -r
NOTE: this isn’t windows. make damn sure your path is correct. Linux is like the honeybadger. IDGAF about you or your files it’ll wreck your day and walk away with a smile.

Ok, let’s get going. https://docs.docker.com/engine/install/ubuntu/
We’re going to use the “apt repository” method. It’s a simple copy and paste affair. Follow all the outlined steps. Then follow steps 2 and 3.
When you ran Step3, you saw that the docker image didn’t exist locally, so the system did a “pull” and obtained it from an online repository.
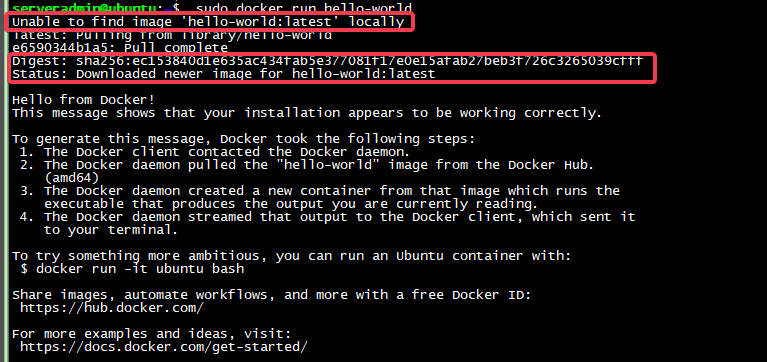
Once it pulled it down the docker started, fired off some text and shut down!
Let’s run sudo docker ps

That command only shows running containers. Let’s add -a. This will show all images. Remember when it’s not running it’s an image. When running, it’s a container.

So here we see the container ID, the image name, etc. Take note this image has no network ports, and the name at the end is randomly generated. Let’s make our docker volume directly and set permissions.
I’ve adopted the standard of using the opt folder for my docker configs. It’s easy to find, standardized, and a bit of a best practice.mkdir /opt/dockerconfigs

ah, lets check permissions. ls -la /opt

root owns it, which is fine. We just need to add sudo to our mkdir command

There’s our directory. What we want to do next is change the permissions for the 1001 user and group to own dockerconfigs. Our docker images will also use the same user. sudo chown -R 1000:1000 /opt/dockerconfigs/
Let’s run ls -la again and review.
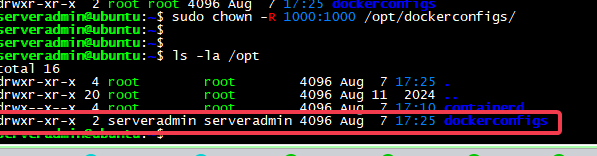
Notice that the folder is now owned by 1001, aliased to my local user. We did not modify opt though. See that ..? that references the folder above us which is opt and is still owned by root.
Now try : mkdir /opt/dockerconfigs/test
Notice we don’t need sudo for this folder creation since we own dockerconfigs. But if you try and make a new folder under /opt sudo is still required. We want to own dockerconfigs so we don’t have to change the permissions for new folders constantly.
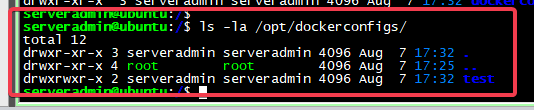
Checking the permissions dockerconfigs shows our test folder has the right settings. Let’s delete our test folder, and remember the honey badger at all times: rm -r /opt/dockerconfigs/test/
Ok, let’s talk Docker Networking.
Docker Networking
Ok, this is where docker gets hella cool. Run: sudo docker network ls

What we care about is host and bridge. Host is the network interface of the VM, and bridge is a default virtual network for use in docker. We can make lots of virtual networks in our docker config.
The vast majority of our containers will be mapped to a network other than host. Mapping a container to host removes much of the flexibility of docker. When we map to a virtual bridge, we can re-use internal ports between containers!
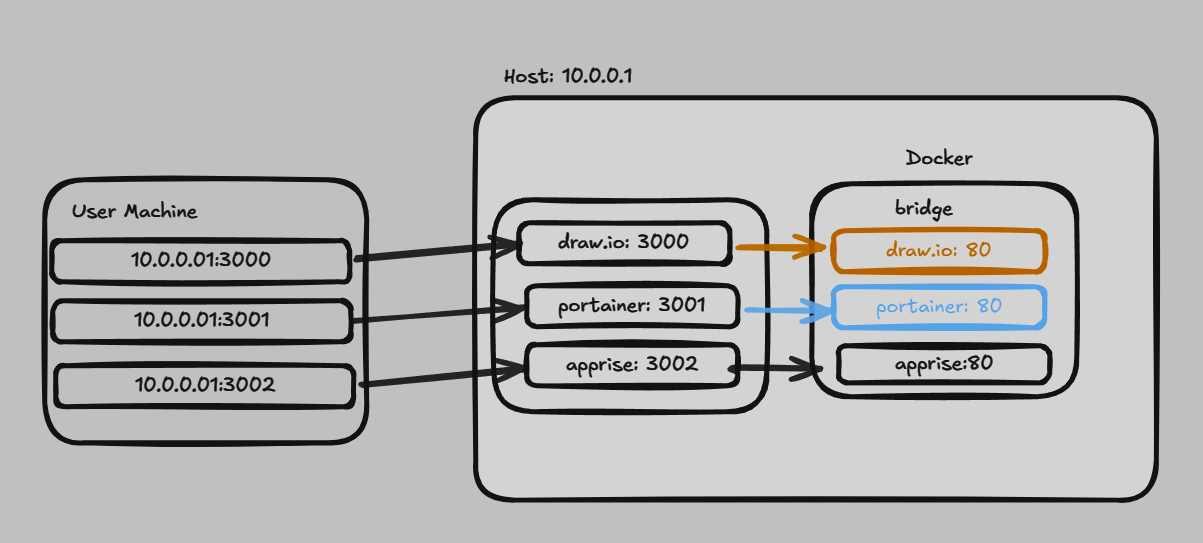
Each container gets its own namespace, so docker knows what service maps to which port. What you cannot do is re-use host ports, because you know…networking.
In this example, all the containers can communicate internally because they are are in same virtual segment. Every container you spin up can have its own network for segmentation. We’ll cover more on that shortly, as there is a change we should make.
So if we inspect the bridge network: sudo docker network inspect bridge we’ll see that it has a 172.17.0.0/16 network assigned.
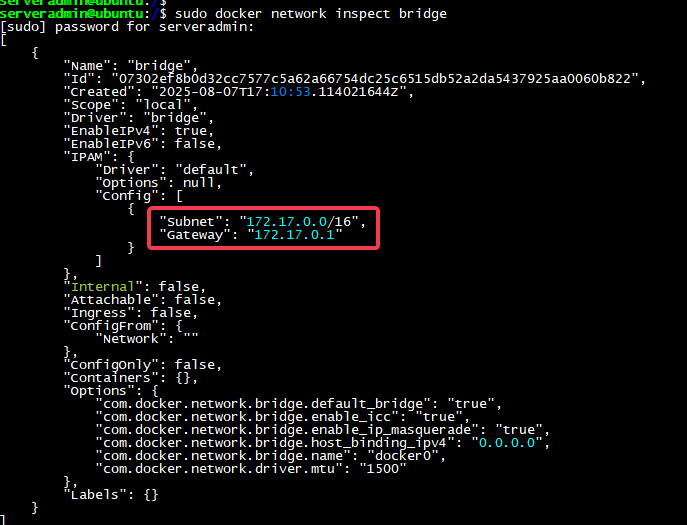
Any new networks we make will get assigned the next range in the series, all /16s. Pretty soon, you’ll hit the 192.168.0.0/16 ranges and that’s just messy and terrible.
Do not like. Keep in mind that if these subnets conflict with a subnet on your network, any traffic destined will blackhole on egress. I mean, if the docker subnet is 172.17.0.0/16 and the source is 172.17.1.1, then there’s nowhere to go. You’re already there. A real “Hotel California” scenario.
So let’s change this behavior to hand out /24s instead in a different range.
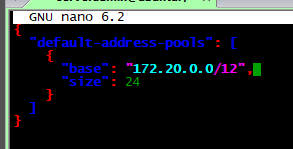
sudo nano /etc/docker/daemon.json
change to the network standard you want and paste:
NOTE: Keep reading. I found an issue and fixed it below.
Then restart the docker daemon. sudo systemctl restart docker
If we re-inspect the bridge, we’ll see it has a /24 now.
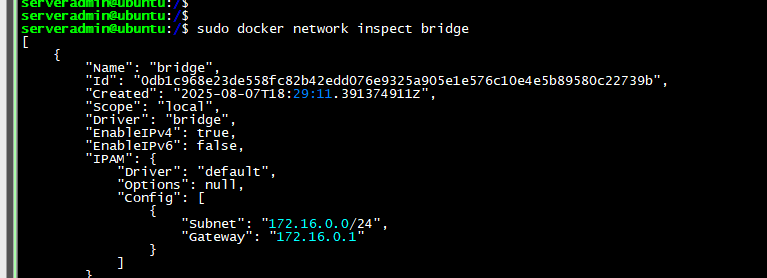
Hol’ up. I noticed that while the CIDR range changed, the IP range did not. After some digging, we need to change the “bridge ip” since the networks iterate off the bridge.
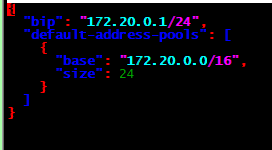
To save in nano, ctrl+x, then save the buffer.
Due to the way Substack mangles the formatting I have an Example on my github. Now when I restart the daemon and inspect the bridge I see the right range, as well with the new networks. This concludes our setup prep.
Running Docker Images
So here’s where we are largely going to deviate from the CLI, and use a GUI tool going forward. The more time I’ve spent with Docker the more I’ve gotten comfortable with CLI, but I do love a good GUI that just makes life…easier.
Let’s talk Portainer, which is a great GUI docker management tool.
Let’s take a look at the instructions. It wants us to create a docker volume for settings, and then run the docker command. We’re going to do something a little different though. Let’s start by making our own folder for the volume.mkdir /opt/dockerconfigs/portainer
Next, lets take a close look at the docker command:docker run -d -p 8000:8000 -p 9443:9443 --name portainer --restart=always -v /var/run/docker.sock:/var/run/docker.sock -v portainer_data:/data portainer/portainer-ce:lts
Let’s pull this apart and check out each section. docker run -d: this runs the docker in detached “headless” mode
-p 8000:8000 -p 9443:9443 - these are the ports it will use. Notice how they are 1:1. The host is on the left, container on the right.
--name portainer - no random names for us, no sir!
--restart=always -this will ensure the container always starts on reboot
-v /var/run/docker.sock:/var/run/docker.sock -this is basically a mount to an external host directory and a directory internal to the container. This is how Portainer will interact with Docker
Let’s take a second and explain further what’s going on with the volume setting before we move on. For the below command: -v portainer_data:/data
This is an actual “docker volume” and the contents are stored pretty deep into the OS, typically at var/lib/docker/volumes. When we specify the folder directly with a full path, that's a bind mount. And that’s what we’ve standardized on. So for our command as shown below, the bind mount or docker volume is the path up to the : , and after that is what the container folder it binds to is. Mounted volumes, like shares also work here.
-v portainer_data:/data-v /opt/dockerconfigs/portainer:/data
This will make sure our config is where we want it to be.portainer/portainer-ce:lts - the name of the image we want to pull and the tag for the version.
Ok, let’s put it all together and run it.
sudo docker run -d -p 8000:8000 -p 9443:9443 --name portainer --restart=always -v /var/run/docker.sock:/var/run/docker.sock -v /opt/dockerconfigs/portainer:/data portainer/portainer-ce:lts

Let’s take a look at sudo docker ps

Lets go have a look at port 9443!
Note: port 8000 is for the edge agent tunnel. If you don’t intend to use it, simply remove “-p 8000:8000” from the above command string. If you’ve already deployed, simply
” sudo docker rm [ID or Name]” and then run the command above minus the port. The container will simply redeploy without the ports.
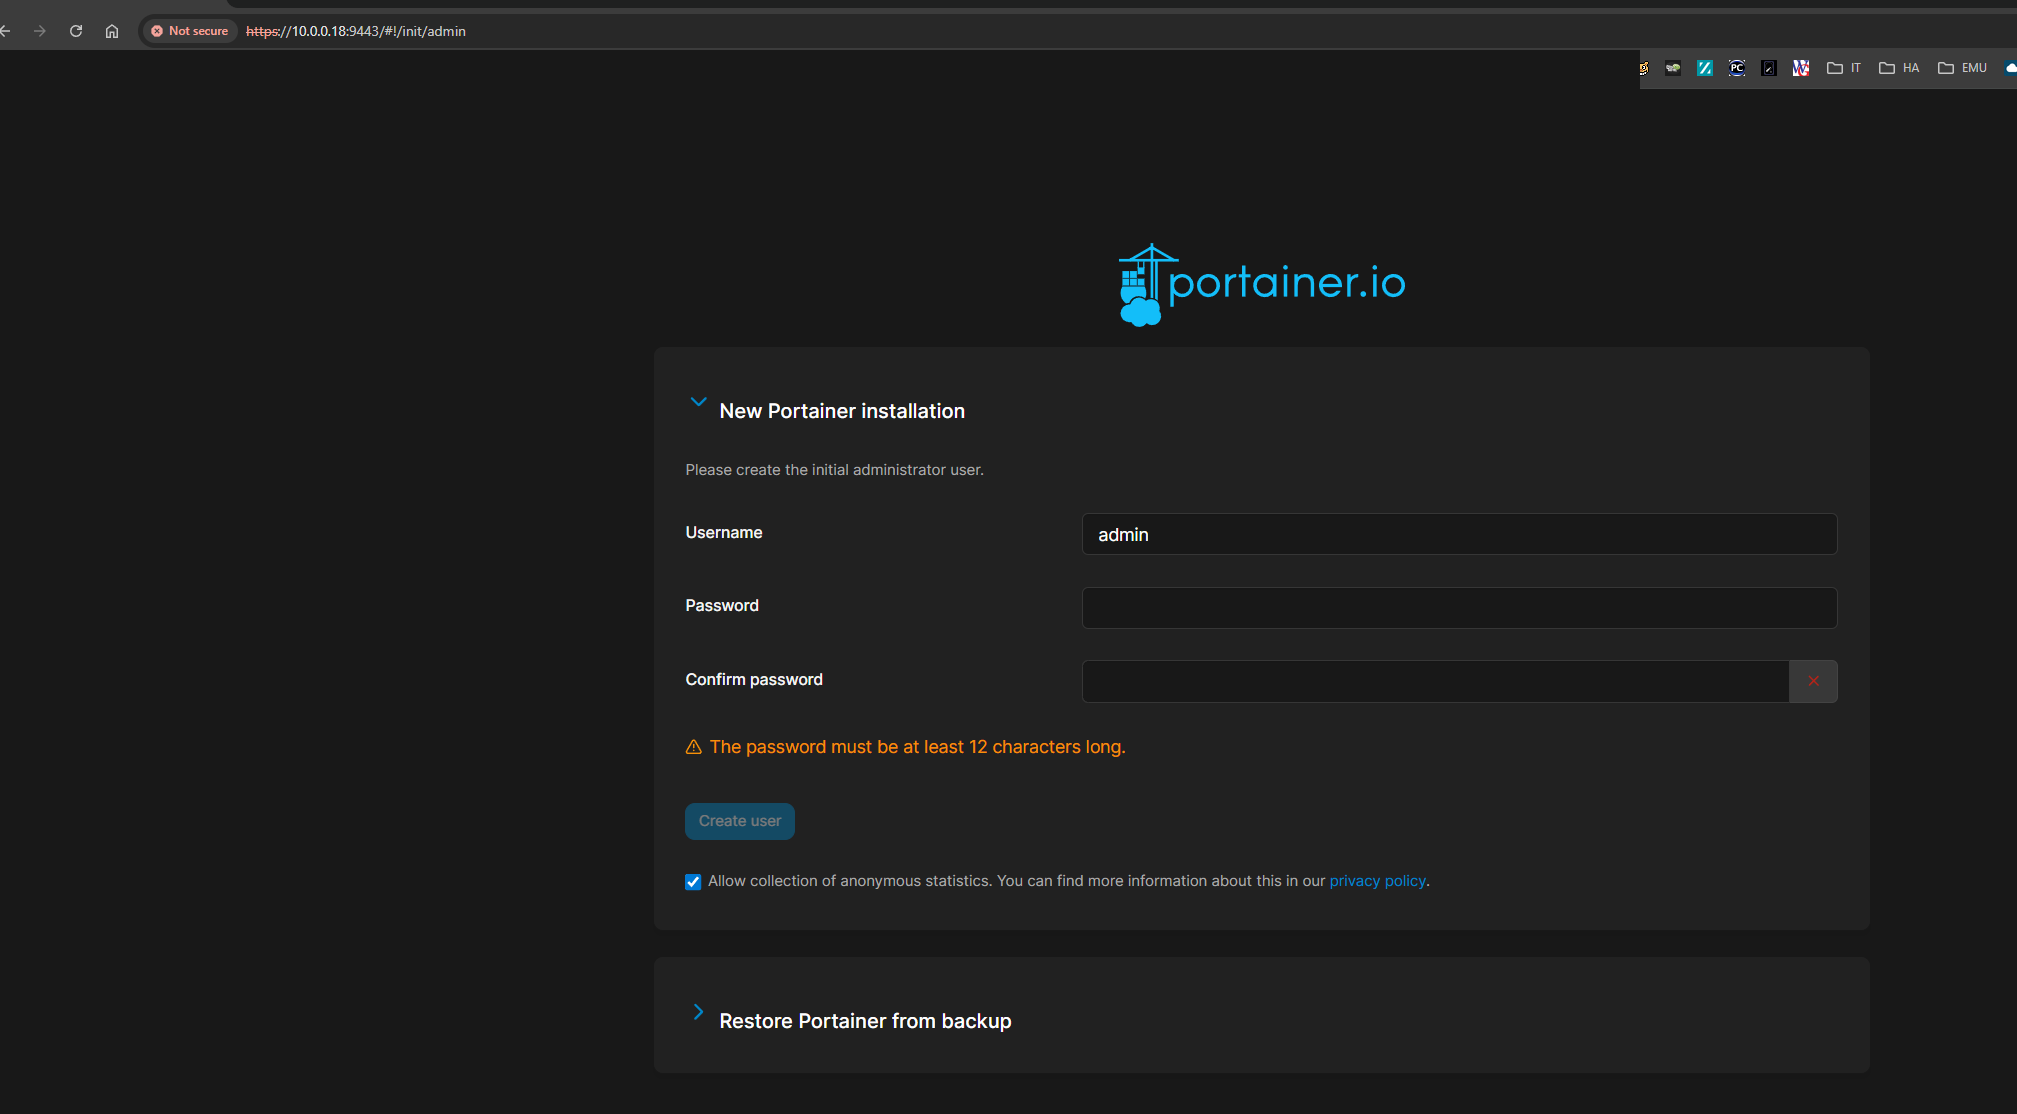
Set a password and log in.
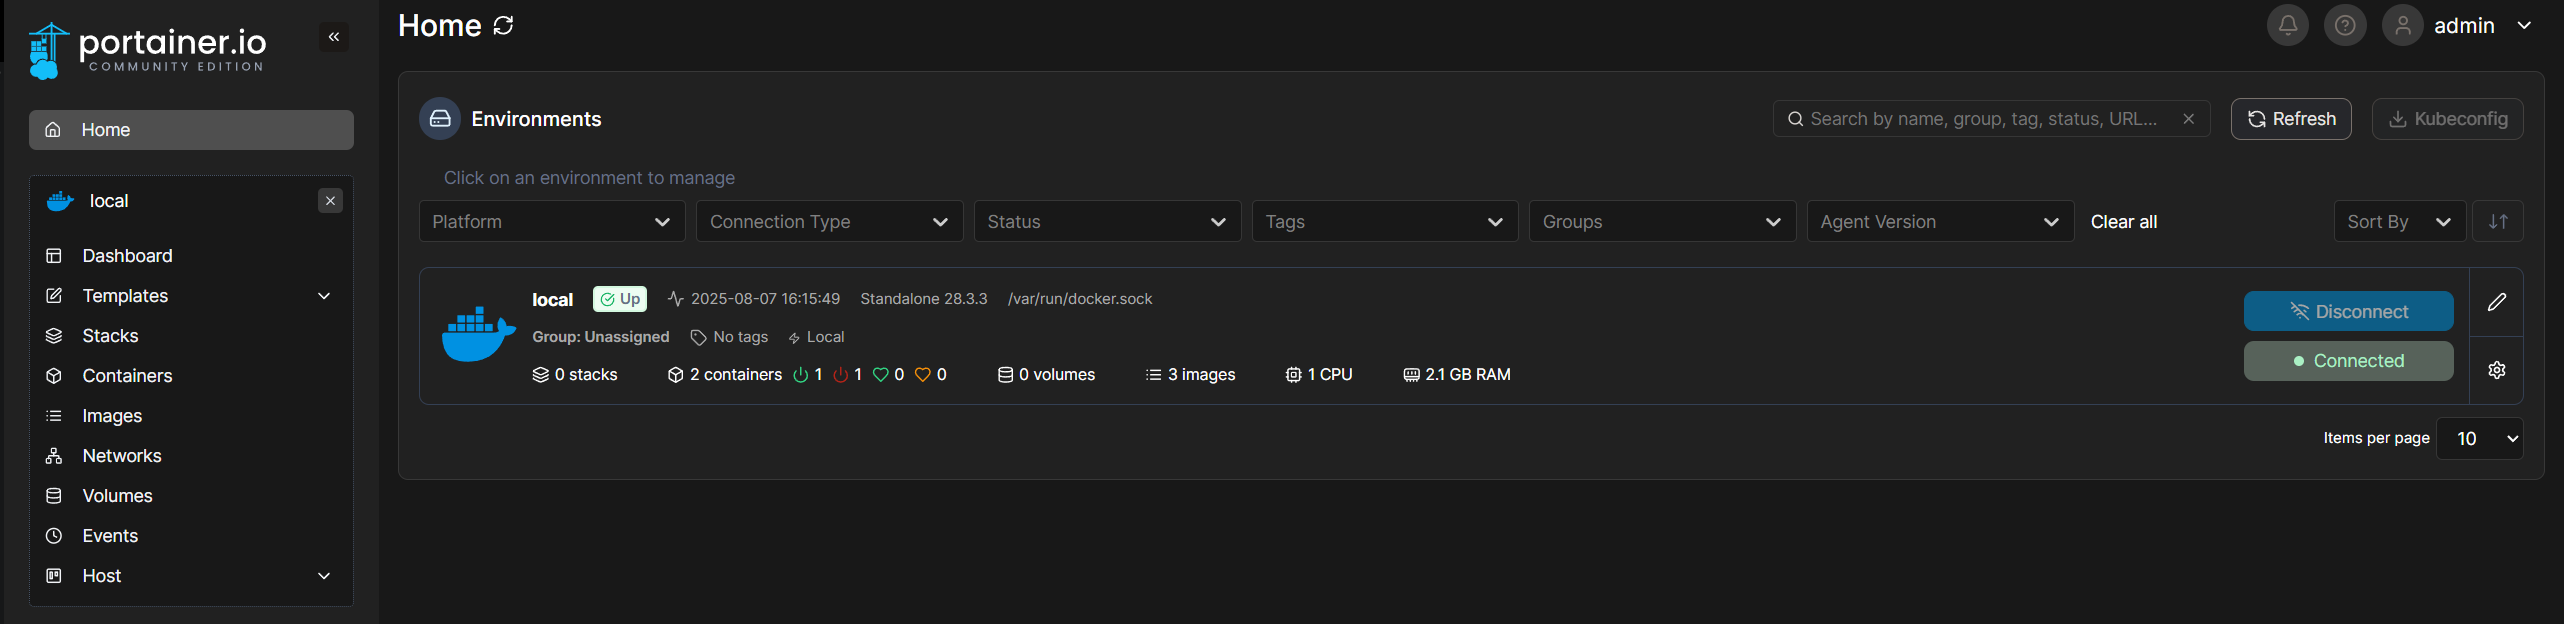
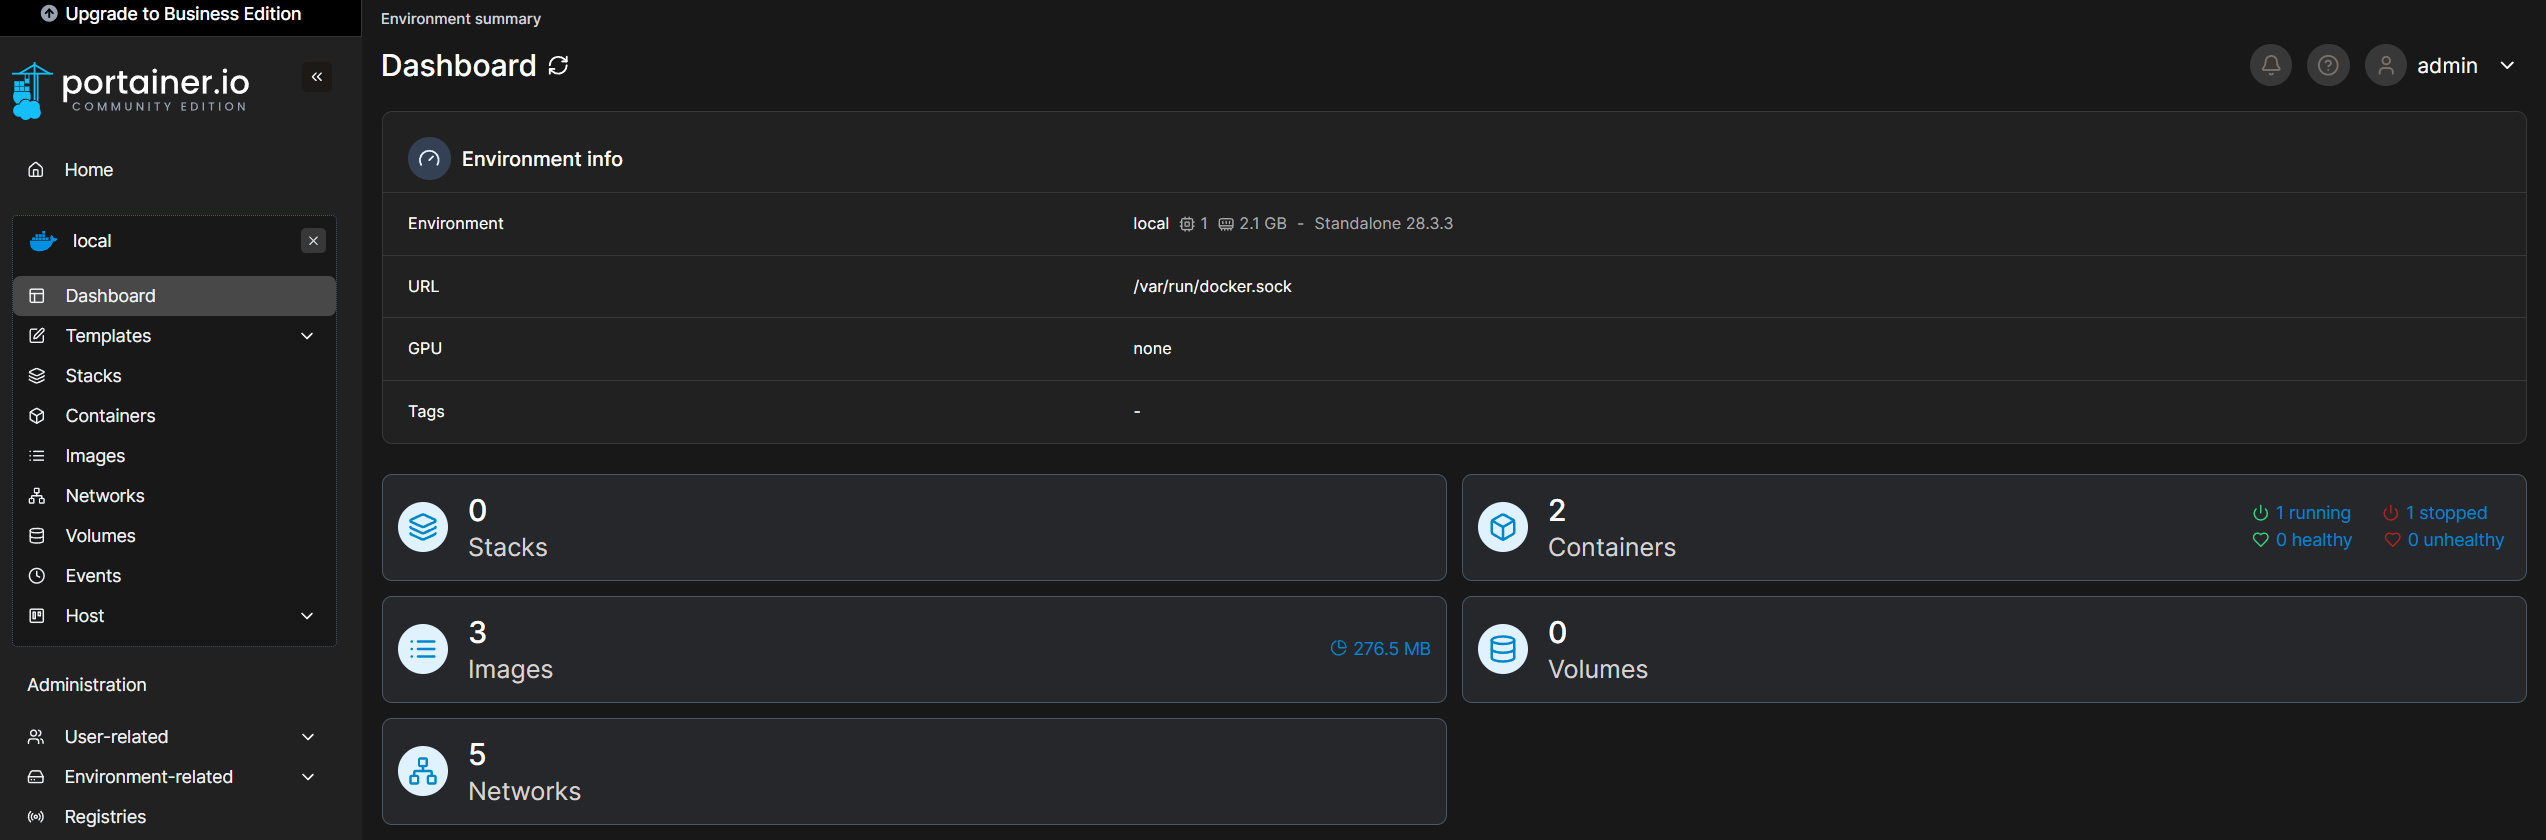
Click into the environment. Now everything Docker related is at your reach!
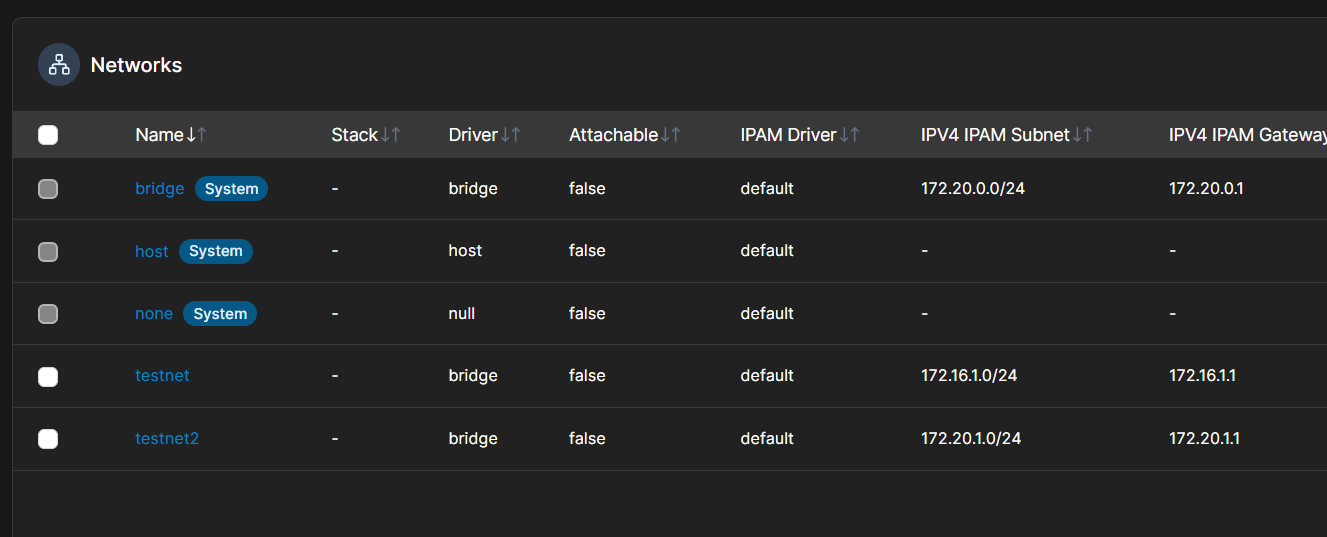
Let’s look at networks. There’s our test networks. I’m going to delete them. Notice how we can’t delete the ones marked “system”. This is a very good thing.
Let’s take a look at containers. Hey there’s our “Hello World” container! I’m going to delete that as well. Notice how we can’t make Portainer walk the plank by deleting it.

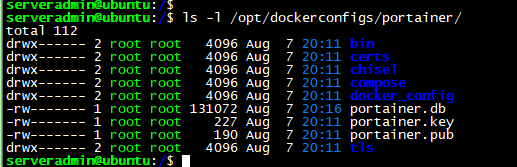
Wait a second…did our config volume mount correctly? Yup!
What network did Portainer join? Lets go into the container and scroll down. Looks like we connected to bridge.

Let’s make our first container in Portainer.
Docker Compose vs Portainer Stacks
You can spin up containers like we did with Portainer or you can use a template style called Docker Compose. Compose and Stacks are basically the same thing, with some minor formatting differences. Stacks can be used to join multiple containers together (example coming) or just do a simple container. I like Stacks a lot and use them exclusively. Claude AI is GREAT at making a Compose file work in a stack.
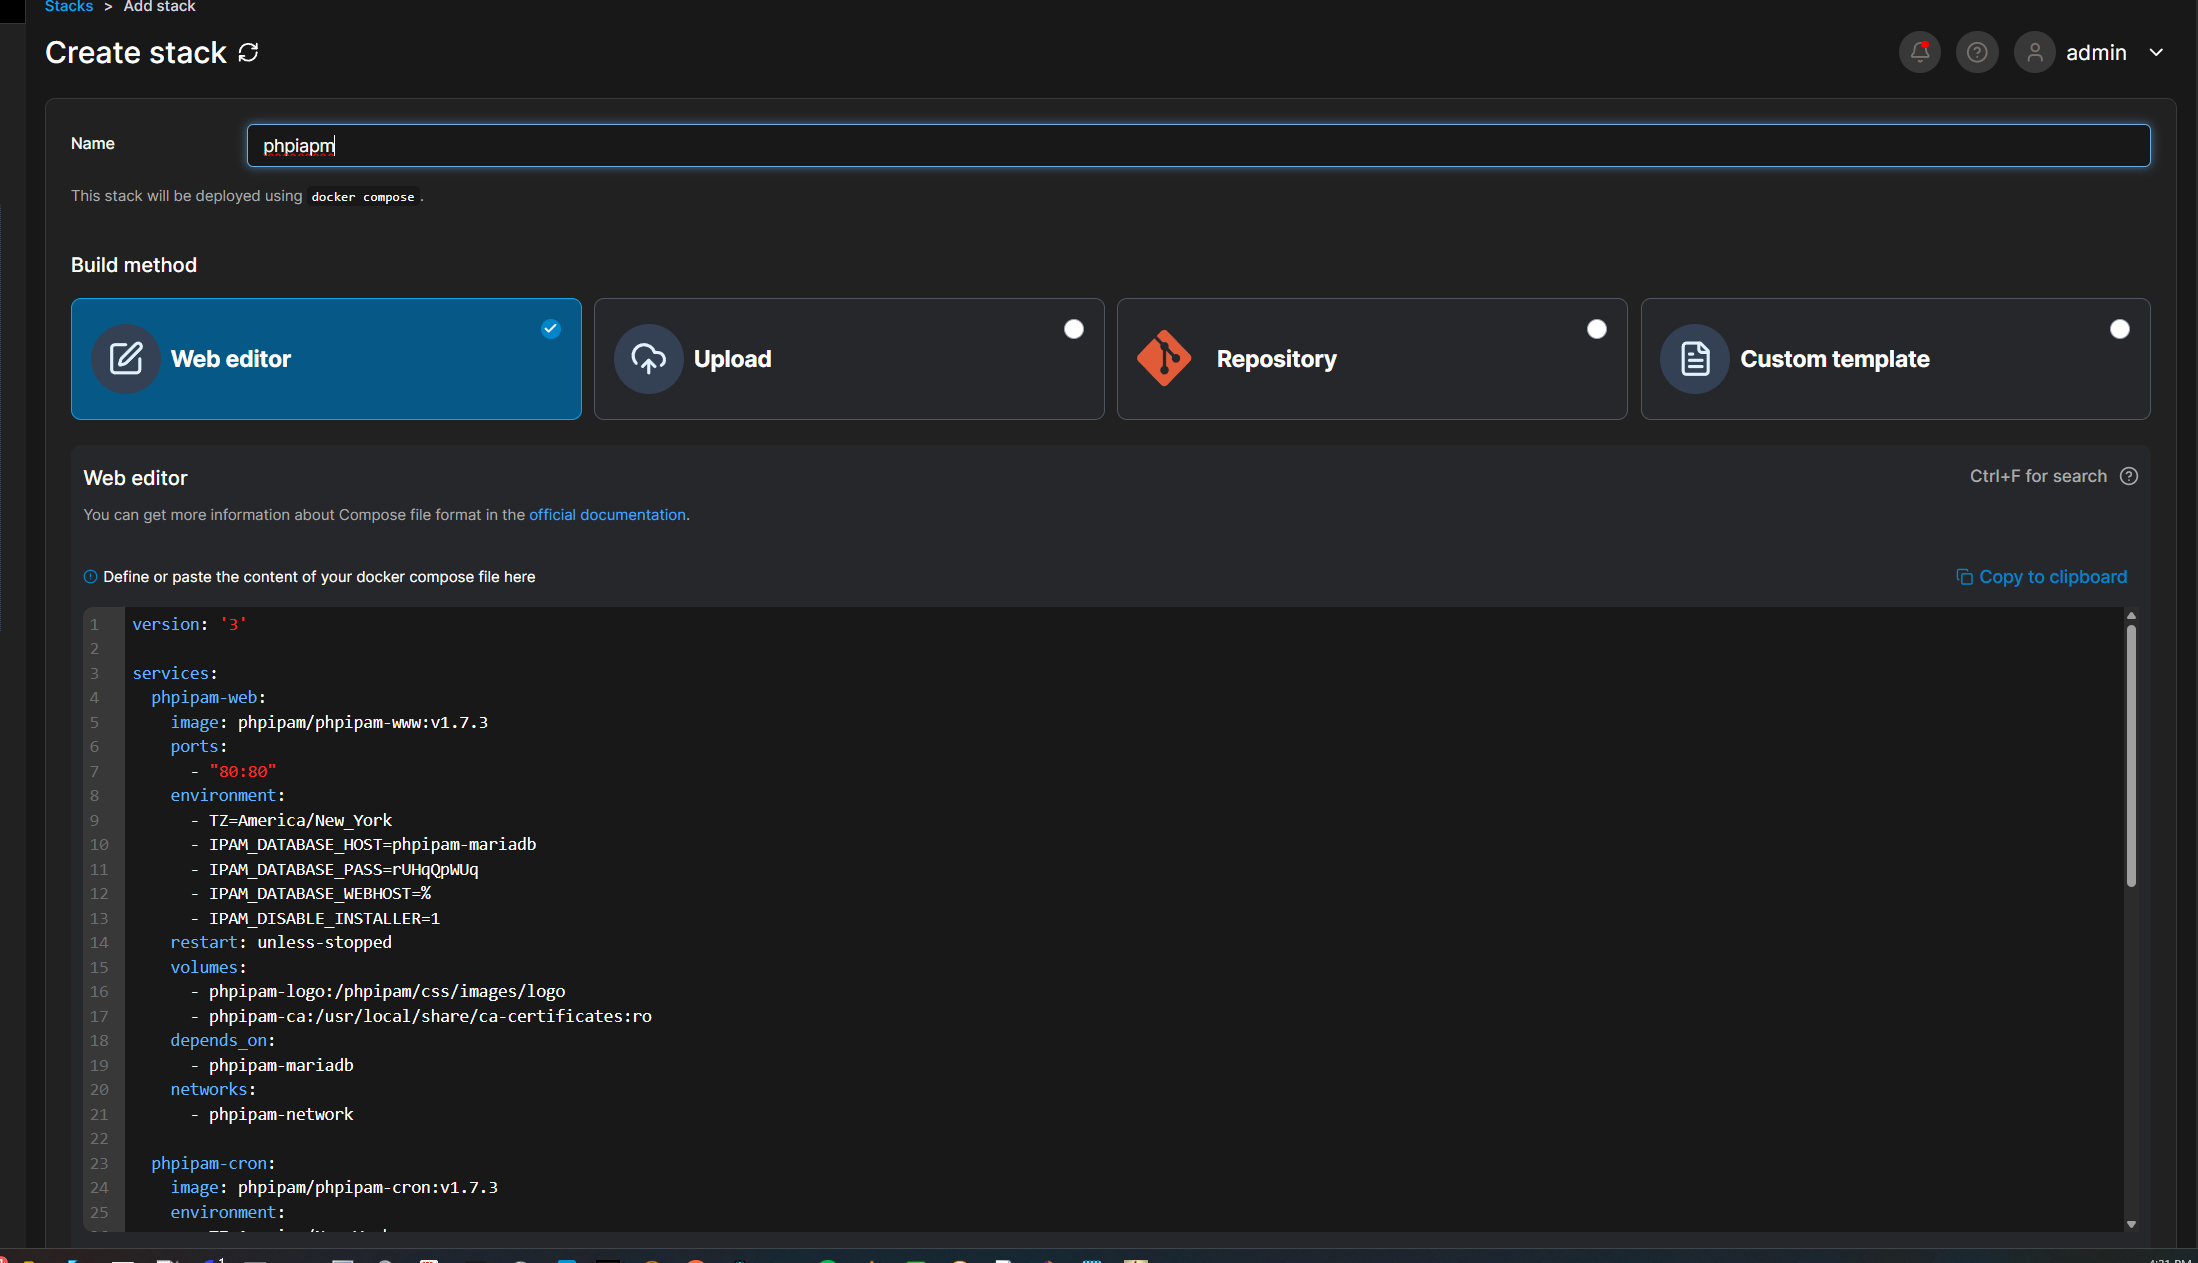
Ok let’s use a crazy one as the first example, PHPIPAM. Example at my Github.
It takes phpipam-web, phpipam-cron, phpipam-mariadb, and builds it all into one service.
I’m going to paste the whole mess in, and at the bottom, “deploy stack”
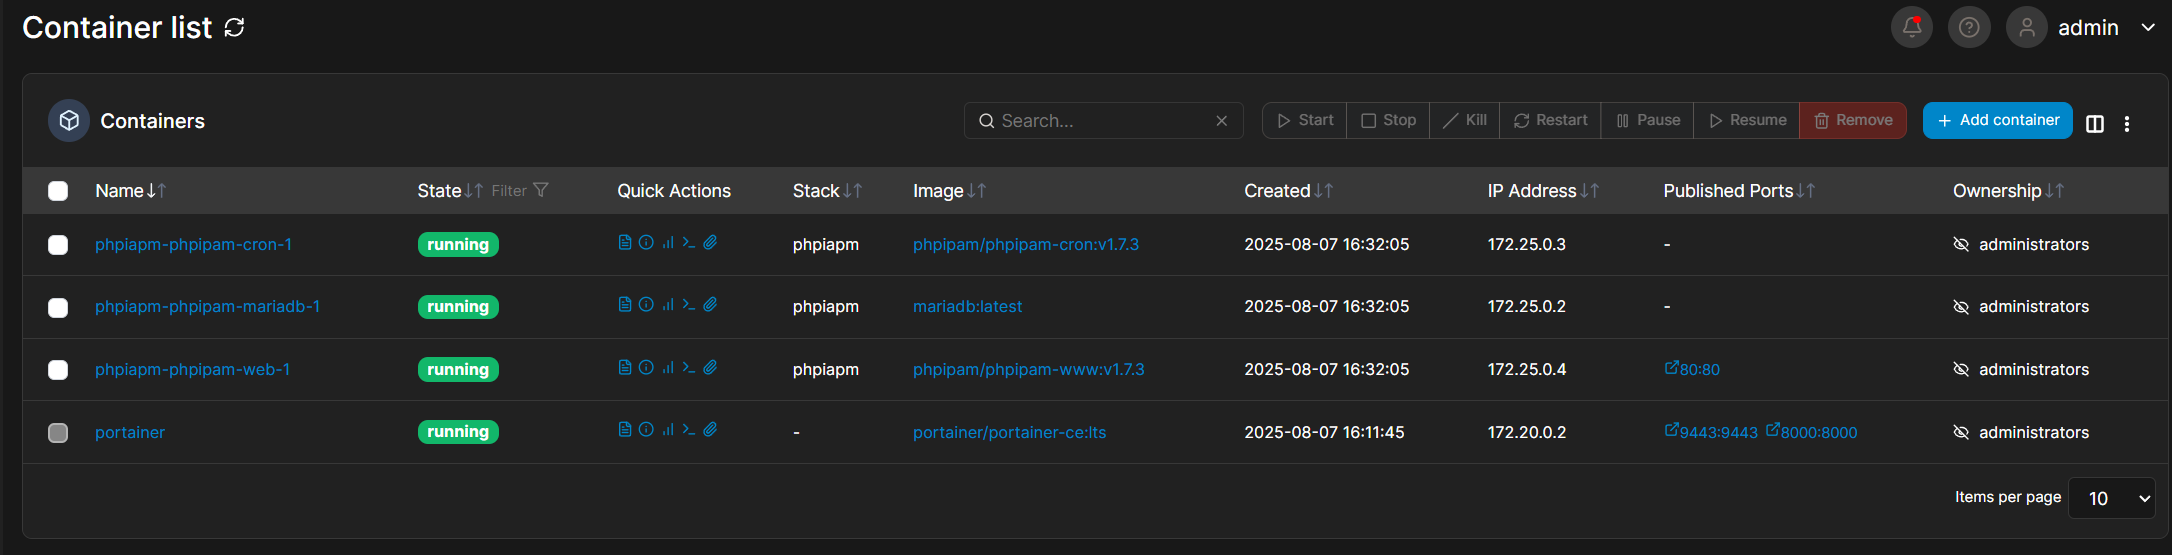
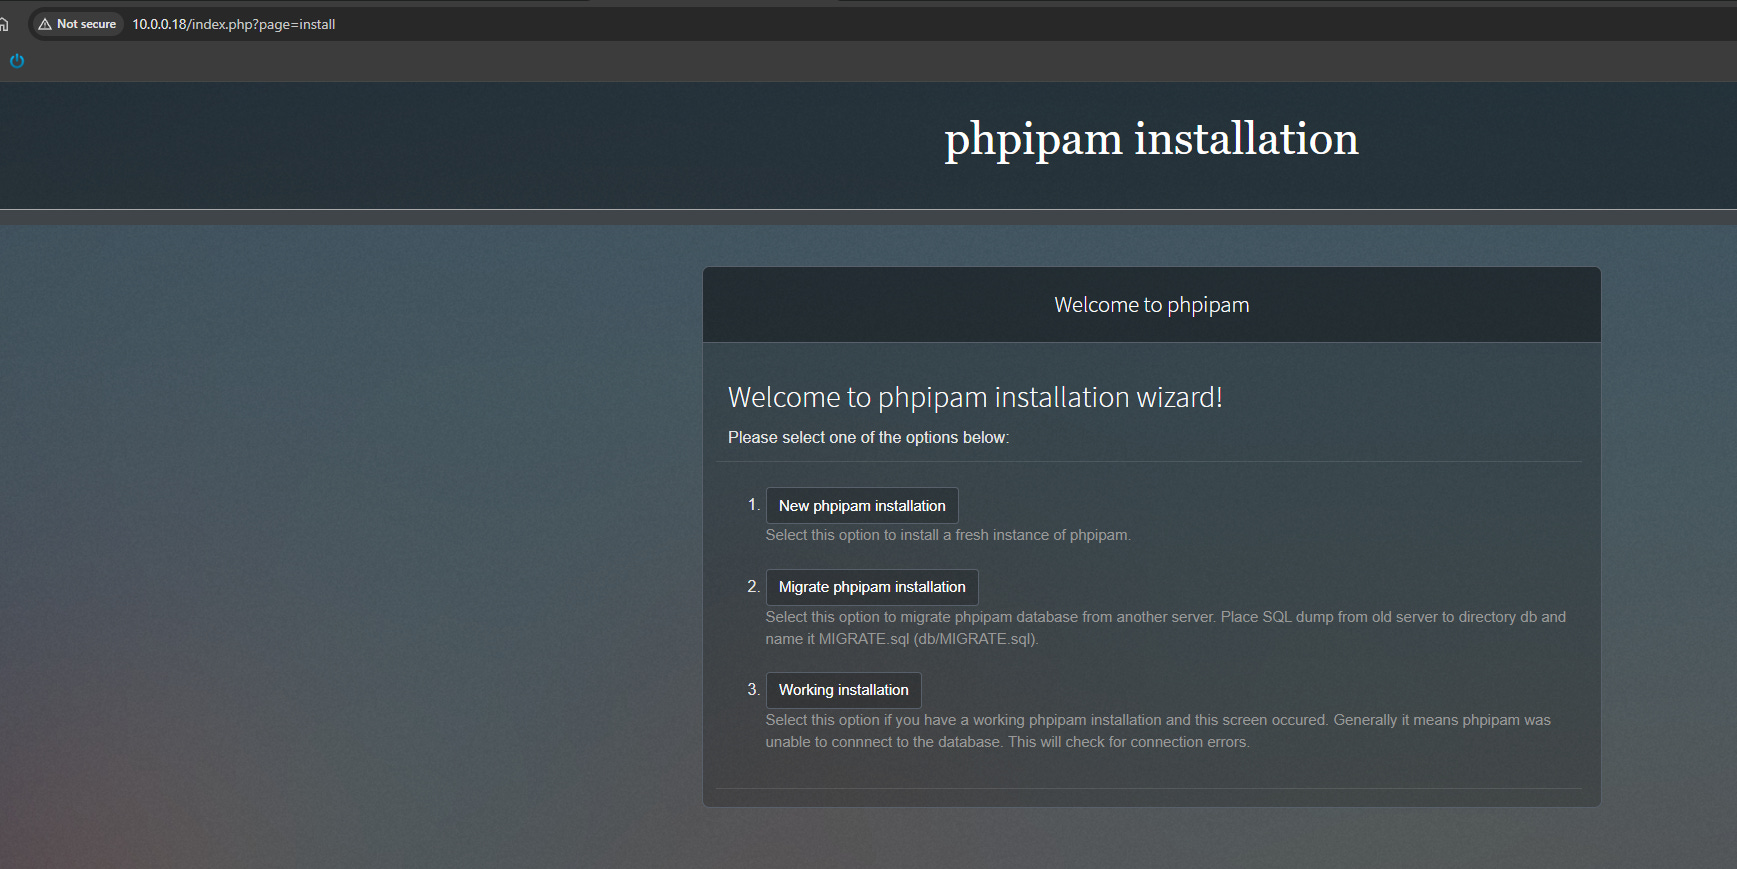
Look…at….that. Lets go to the web interface at port 80!
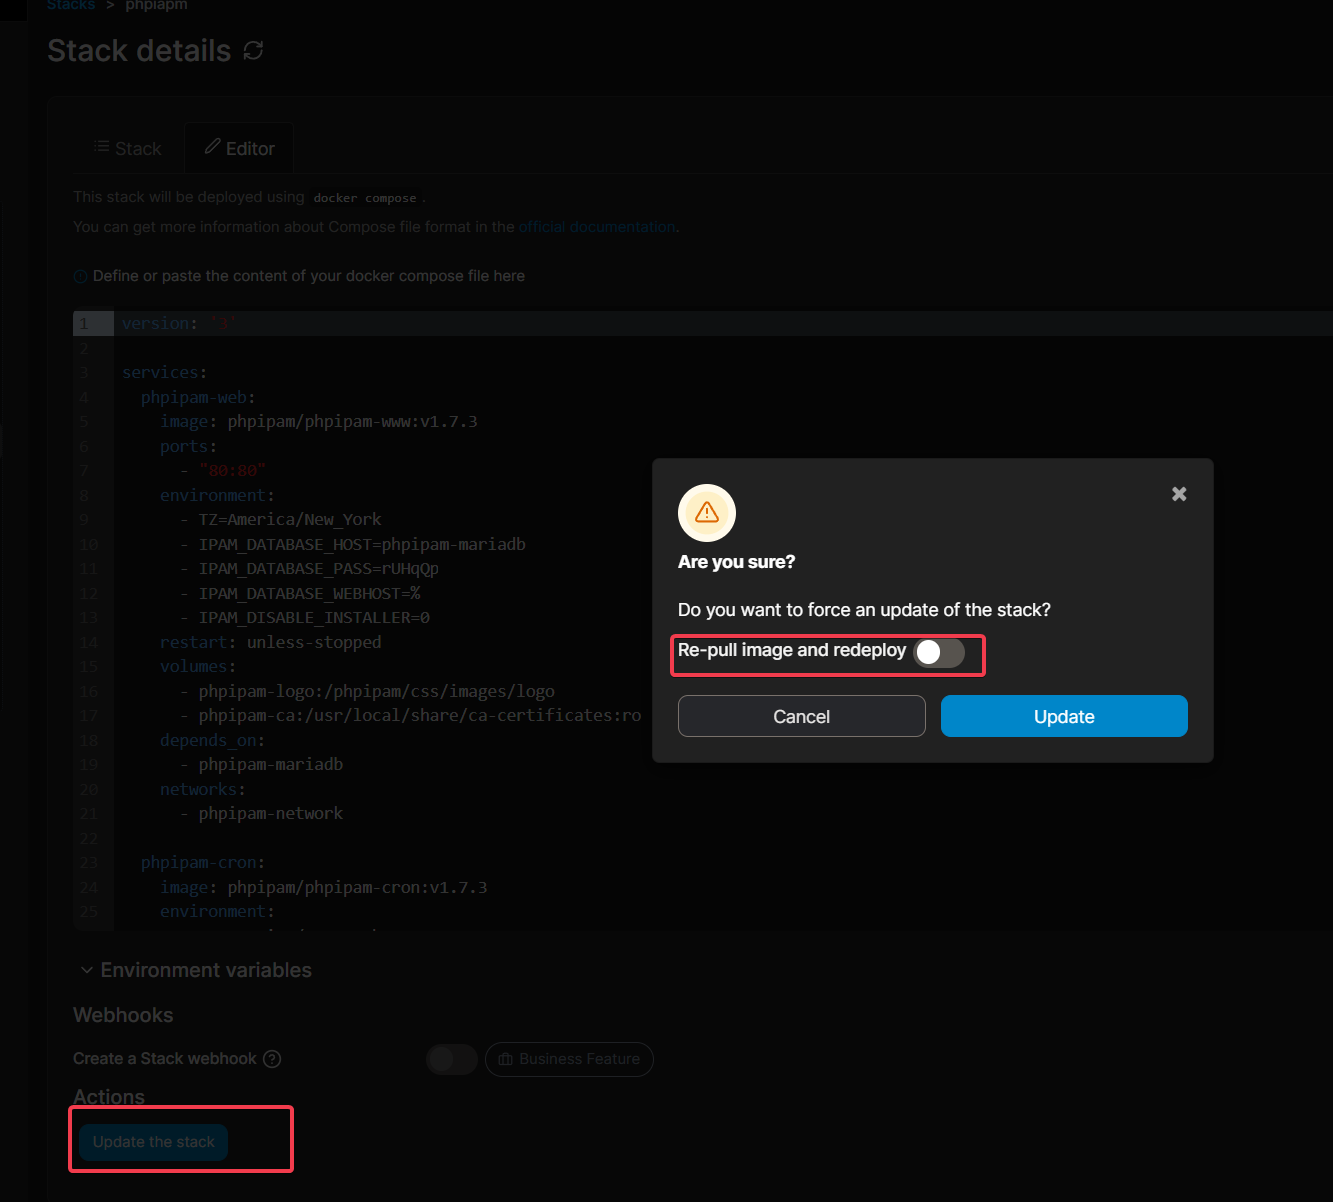
Now the cool thing about stacks is, what if you want to update the images? Simple. Go back to the stack, click “editor” and then scroll down to “Update the stack”. Enable the re-pull option and then update. If you are just changing the stack variables, then an update without the pull will re-deploy with the same image.
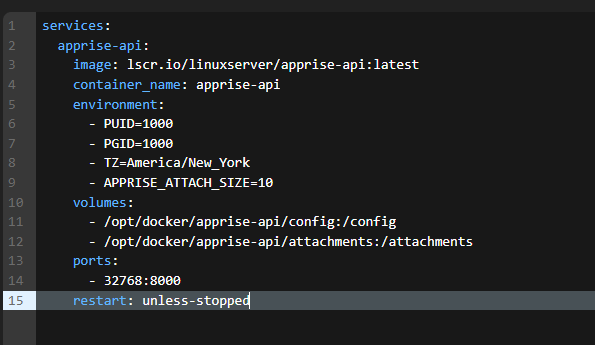
Let’s finish this up with a simpler example. This is a notification system, “apprise”.
Now that I gave you a primer, a lot of this should make sense. Take note of the environment variables. as a best practice the PUID and PGID should be in your stacks for permission conformity. Remember, we gave our folder the 1000 permissions.
Oh, be aware that indentation is critical for our stack config.
Ok, that was a lot. Let’s close with one last thing. What if you want to check the logs, or log into the container? These I prefer to do via cli, it’s a bit tedious in the GUI.
sudo docker exec -it [name or container id] /bin/bash

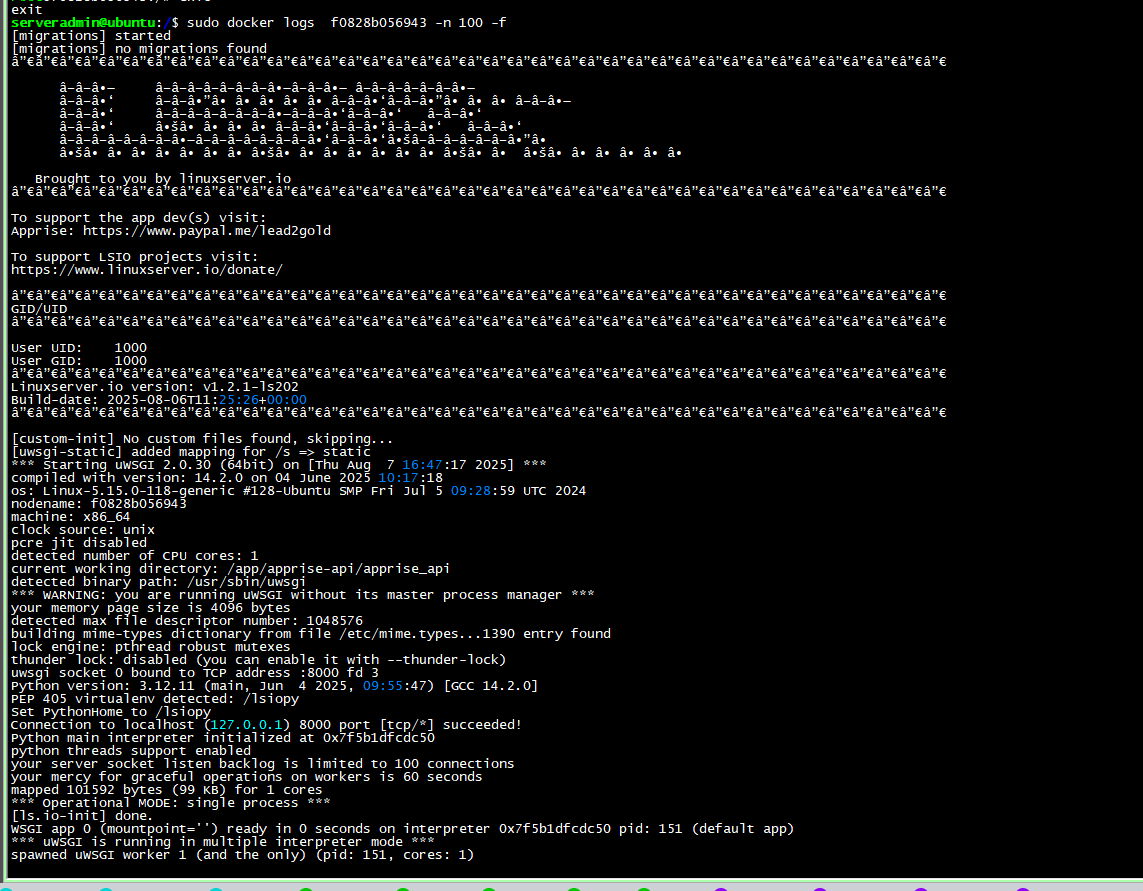
See how my prompt changed to root? Let’s exit out and look at logs.
sudo docker logs [name or container id] -n 100 -f
Ok that about wraps it up. If you want a really deep dive into docker I highly recommend:
And remember, if there’s an app you want to run the first thing you should ask is…hey is there a docker for that? :)
Until next time.